Achieve a professional sear on your salmon fillets at home with this simple, high-heat technique. This method produces a crisp, golden exterior while keeping the center tender and moist in under fifteen minutes.
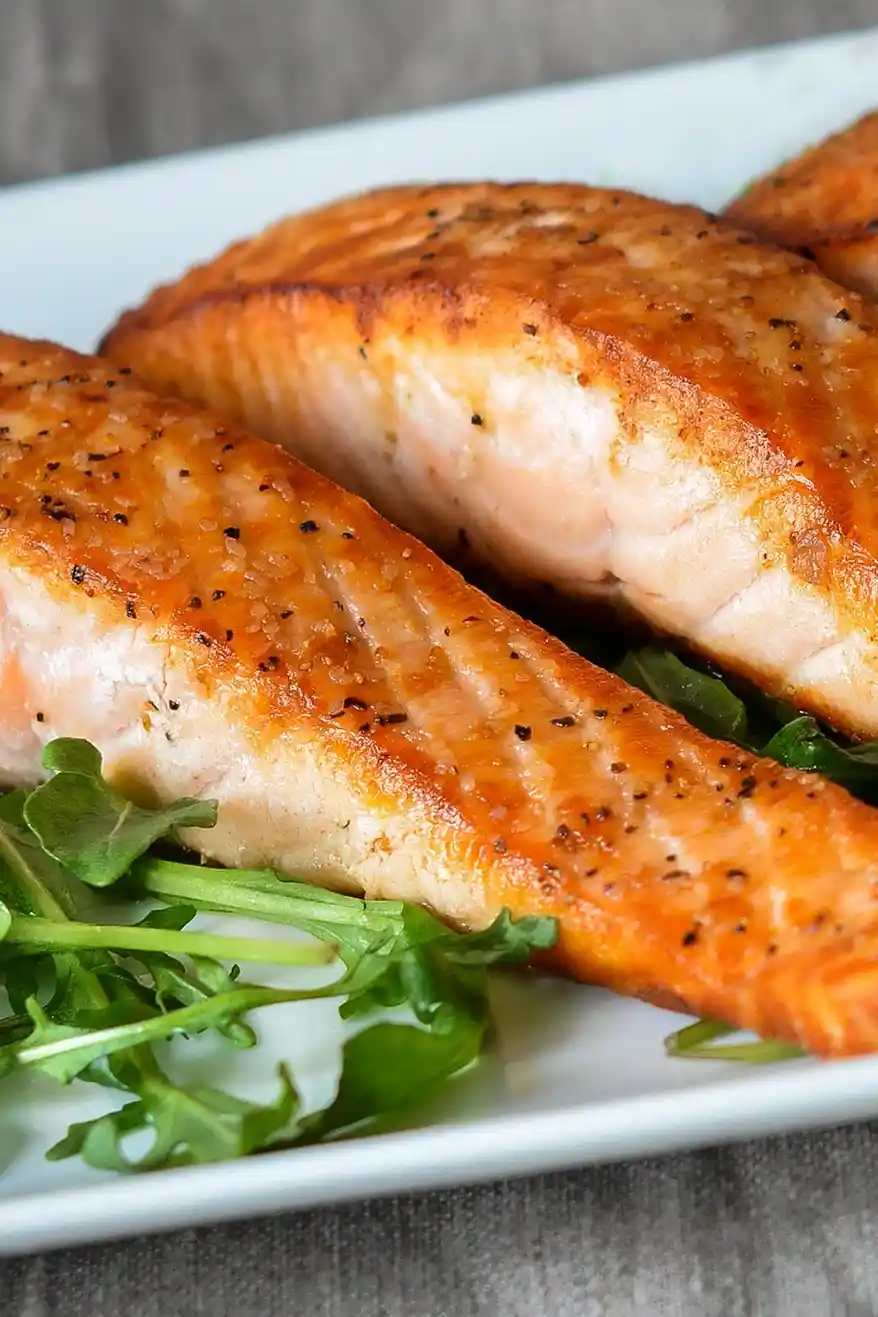
List of ingredients
- 1 tablespoon extra-virgin olive oil – used for searing and preventing the fish from sticking to the pan.
- ½ teaspoon kosher salt – enhances the natural flavor and helps create a crust.
- Freshly ground black pepper – provides a subtle, spicy contrast to the rich fish.
- 4 (6-oz) salmon fillets, 1¼-in (3-cm) thick – uniform thickness ensures all pieces cook evenly.
step-by-step instructions
- Season the fish: Sprinkle the salmon fillets evenly with the kosher salt and a few grinds of black pepper on all sides.
- Heat the pan: Pour the olive oil into a 12-inch nonstick skillet and heat over medium-high heat until the oil is hot and shimmering.
- Sear the first side: Place the salmon fillets in the skillet, skin side up. Cook without moving them for about 4 minutes until the top is golden and crisp.
- Flip and reduce heat: Carefully flip the fillets using a spatula and immediately reduce the heat to medium.
- Finish cooking: Continue cooking for another 4 to 5 minutes, or until the salmon reaches your preferred level of doneness.
- Serve: Transfer the cooked fillets to a platter and serve immediately while hot.
Professional Salmon Selection Tips
Prioritize Fillet Thickness for Even Cooking
Choose fillets that are approximately 1.25 inches thick. This thickness allows the exterior to develop a deep golden crust without overcooking the center. Thinner cuts often overcook before the sear is fully developed.
Identify Freshness Through Color and Scent
Fresh salmon should have a vibrant, consistent color without any brown spots or bruising. It should smell like the ocean or be scentless, rather than having a strong fishy odor. Avoid fillets that feel mushy or leave a fingerprint when pressed.
Choose Between Wild and Farmed Varieties
Wild-caught salmon typically has a deeper red color and a leaner profile with a more intense flavor. Farmed salmon is generally lighter in color and contains higher fat levels, which can make it more forgiving during the searing process.
Manage the Salmon Skin Based on Preference
Keeping the skin on provides a protective barrier that prevents the flesh from overcooking. It also allows you to achieve a very crispy texture on the skin side. If you prefer skinless fillets, have your fishmonger remove it before purchase.
Bring Salmon to Room Temperature Before Searing
Let the fillets sit at room temperature for about 15 to 20 minutes before cooking. This prevents the pan temperature from dropping too sharply when the fish is added. It also ensures the center cooks more evenly with the exterior.
Essential Equipment for the Perfect Sear
Use a Large Nonstick Skillet
A 12-inch nonstick pan provides enough surface area to prevent overcrowding. Overcrowding the pan lowers the temperature and causes the salmon to steam rather than sear. The nonstick surface is critical for flipping the fish without tearing the crust.
Employ a Wide Fish Spatula
A thin, wide metal or silicone fish spatula allows you to get underneath the fillet easily. This prevents the golden crust from breaking or sticking to the pan during the flip. Avoid using forks or tongs that might pierce the delicate flesh.
Utilize an Instant-Read Digital Thermometer
Relying on time alone can be inaccurate due to varying stove temperatures. A digital thermometer allows you to pull the fish off the heat at the exact degree you prefer. This is the only way to guarantee consistent results every time.
Prepare with Paper Towels
Use paper towels to pat the salmon fillets completely dry before seasoning. Moisture on the surface of the fish creates steam, which prevents the Maillard reaction. Dry fish sears faster and develops a much more pronounced crust.
Cooking Temperature and Doneness Guide
Target Medium-Rare for Maximum Moisture
Pull the salmon from the pan when the internal temperature reaches 125°F (52°C). The carry-over heat will bring it up to about 130°F while resting. This results in a translucent, buttery center.
Aim for Medium for a Firmer Texture
Cook the fillets until the internal temperature reaches 135°F (57°C). This is the standard restaurant preparation, offering a balance between moistness and structure. The fish will flake easily but still remain juicy.
Avoid Overcooking Past Medium-Well
Once salmon exceeds 145°F (63°C), the proteins contract and push out the moisture. This leads to a dry, chalky texture and the appearance of white albumin proteins on the surface. Stop cooking before the fish becomes opaque throughout.
Allow for Carry-Over Cooking
Salmon continues to cook for several minutes after being removed from the heat. Always remove the fish from the pan 5 degrees before it reaches your target temperature. Let it rest on a platter for 3 to 5 minutes before serving.
Alternative Ingredients and Flavor Swaps
Substitute Olive Oil with Avocado Oil
Avocado oil has a higher smoke point than extra-virgin olive oil. This makes it a safer choice for very high-heat searing without the risk of the oil burning. It also has a neutral flavor that does not compete with the salmon.
Use Ghee for a Richer Flavor Profile
Ghee, or clarified butter, provides the rich taste of butter but with a much higher smoke point. It creates an exceptionally golden crust and adds a nutty aroma to the fillets. Use it in the same quantity as the olive oil.
Replace Kosher Salt with Fine Sea Salt
If you do not have kosher salt, fine sea salt is an acceptable alternative. Be mindful that fine salt is more dense, so use slightly less than the measured amount of kosher salt. This prevents the fish from becoming overly salty.
Add Lemon Zest for Brightness
Rubbing a small amount of fresh lemon zest onto the fillets before searing adds a citrusy aroma. The zest caramelizes slightly in the pan, adding depth to the crust. This is a great way to add flavor without adding liquid.
Serving and Pairing Suggestions
Pair with Roasted Root Vegetables
Roasted carrots or parsnips provide a sweet contrast to the savory sear of the salmon. Toss them in olive oil and salt, then roast at 400°F until tender. This creates a visually appealing and nutritionally balanced plate.
Serve Over a Bed of Wilted Spinach
Sauté fresh spinach with a touch of garlic and lemon juice for a light side. The bitterness of the greens cuts through the richness of the salmon fat. This pairing is low-carb and quick to prepare.
Accompany with a Creamy Puree
Mashed cauliflower or a pea puree adds a professional, elegant touch to the presentation. Spoon the puree onto the plate and place the salmon fillet directly on top. This method keeps the fish elevated and the crust crisp.
Use a Simple Citrus Reduction
Simmer lemon juice and a touch of honey in a small pan until thickened. Drizzle this reduction over the salmon just before serving. The acidity balances the fatty oils of the fish perfectly.
Storage and Reheating Instructions
Store Leftovers in Airtight Glass Containers
Place cooled salmon fillets in a glass container with a tight-sealing lid. This prevents the fish from absorbing odors from the refrigerator. Cooked salmon will remain safe to eat for up to three days.
Avoid Reheating in the Microwave
Microwaves heat unevenly and often overcook the exterior of the fish while leaving the center cold. This turns the texture rubbery and destroys the crisp crust. Avoid this method if you want to maintain quality.
Reheat in a Low-Temperature Oven
Preheat your oven to 275°F (135°C). Place the salmon on a baking sheet and warm for 10 to 15 minutes until just heated through. This gentle method preserves the moisture of the fillet.
Utilize an Air Fryer for Texture Recovery
Set an air fryer to 350°F (175°C) and heat the salmon for 3 to 5 minutes. This can help restore some of the crispness to the seared crust. Monitor closely to ensure the fish does not dry out.
Common Searing Troubleshooting
Prevent Salmon from Sticking to the Pan
If the fish feels stuck, do not force it with the spatula. A proper sear creates a natural release; if it is sticking, it simply hasn’t formed a crust yet. Give it another 30 to 60 seconds of undisturbed heat.
Fix a Lack of Golden Browning
If the salmon is cooking through but not browning, your pan temperature is too low. Ensure the oil is shimmering before adding the fish. Also, verify that the fillets were patted completely dry before seasoning.
Stop Salmon from Breaking During the Flip
Breaking usually occurs if the fish is flipped too early or if the spatula is too small. Wait for the fillet to release naturally from the pan surface. Use a wide fish spatula to support the entire base of the fillet during the turn.
Manage Excessive Oil Splattering
Splattering occurs when water hits hot oil. To minimize this, ensure the salmon is dry and the pan is not overcrowded. Using a splatter screen can keep your stovetop clean without affecting the sear.
Frequently Asked Questions
Should I leave the skin on or take it off?
Leaving the skin on is recommended as it protects the meat from direct heat and creates a delicious crisp layer. However, if you prefer a skinless result, you can remove it before cooking without changing the method.
Can I use frozen salmon fillets for this recipe?
Yes, but they must be completely thawed in the refrigerator overnight. Cooking salmon from frozen will result in a steamed texture and prevent the formation of a golden crust. Pat them extra dry as frozen fish releases more moisture.
How do I know the salmon is done without a thermometer?
Gently press the top of the fillet with your finger or a fork. If the flesh flakes easily along the white lines (fat layers), it is done. If it resists and feels springy, it needs more time.
What if I don’t have a nonstick pan?
You can use stainless steel or cast iron, but you must use more oil to prevent sticking. Ensure the pan is very hot before adding the fish. Be prepared for a slightly more difficult flip than with nonstick cookware.
Can I season the salmon hours in advance?
Salt draws moisture out of the fish over time. If you salt too early, the surface will become wet, which hinders the searing process. Season the salmon immediately before placing it in the pan for the best crust.
Print
Restaurant-Style Pan-Seared Salmon
- Total Time: 15 minutes
- Yield: 4 servings 1x
- Diet: Pescatarian
Description
Restaurant-quality pan seared salmon—crisp on top and just barely cooked in the center—is easy to make at home.
Ingredients
- 1 tablespoon extra-virgin olive oil
- ½ teaspoon kosher salt
- Freshly ground black pepper
- 4 (6-oz) salmon fillets, 1¼-in (3-cm) thick
Instructions
- Season: Season the salmon with the salt and a few grinds of pepper.
- Heat: Heat the oil in a 12-in (30-cm) nonstick skillet over medium-high heat until hot and shimmering.
- Sear: Cook the salmon, without moving, skin side up, until golden and crisp, about 4 minutes.
- Flip: Carefully flip the fillets and reduce the heat to medium.
- Finish: Continue cooking until done to your liking, 4 to 5 minutes more.
- Serve: Transfer to a platter and serve.
Notes
The key to perfect pan-seared salmon is choosing the right size fillets and allowing them to cook undisturbed to ensure a beautiful golden crust.
- Prep Time: 5 minutes
- Cook Time: 10 minutes
- Category: Fish & Seafood
- Method: Pan-Searing
- Cuisine: American
Nutrition
- Serving Size: 1 fillet
- Calories: 384 kcal
- Sugar: 0 g
- Sodium: 336 mg
- Fat: 26 g
- Saturated Fat: 6 g
- Unsaturated Fat: 20 g
- Trans Fat: 0 g
- Carbohydrates: 0 g
- Fiber: 0 g
- Protein: 35 g
- Cholesterol: 94 mg