These buttermilk-marinated chicken thighs feature a thick, seasoned crust and a juicy interior. Following a specific marination and frying process ensures a professional-grade crunch at home.

List of ingredients
- 2 tablespoons paprika – adds a rich color and smoky undertone.
- 2 tablespoons ground black pepper – provides a bold, pungent heat.
- 1 tablespoon onion powder – adds a concentrated savory depth.
- 1 tablespoon garlic powder – provides a strong aromatic base.
- 1/2 teaspoon cayenne pepper – introduces a sharp spicy kick.
- 1 cup buttermilk – tenderizes the meat through lactic acid.
- 1 large egg – acts as a binder to help the coating adhere.
- 1 tablespoon coarse kosher salt – used for the marinade brine.
- 2 cups flour – the primary structure for the crispy crust.
- 2 teaspoons coarse kosher salt – seasons the flour dredge.
- 3 pounds boneless skinless chicken thighs – the preferred juicy protein.
- Neutral oil – for frying, such as canola, vegetable, or peanut oil.
step-by-step instructions
- Combine Spice Blend: Mix the paprika, black pepper, onion powder, garlic powder, and cayenne pepper in a small bowl until well combined.
- Marinate the Chicken: Whisk together the buttermilk, egg, 1 tablespoon of salt, and 2 tablespoons of the prepared spice mixture in a large bowl. Add the chicken thighs, stirring to ensure full coverage, and refrigerate for at least one hour or up to overnight for maximum tenderness.
- Prepare the Dredge: In a separate large bowl, whisk the flour, 2 teaspoons of salt, and the remaining spice mixture. Stir in 3 tablespoons of the buttermilk marinade using your fingertips to create small clumps in the flour for extra texture.
- Coat the Thighs: Remove one piece of chicken at a time from the marinade, letting excess liquid drip off. Press the seasoned flour firmly into the chicken on all sides to ensure the breading sticks and forms a thick layer.
- Initial Fry: Heat about 1 inch of neutral oil in a deep skillet to 350°F. Lower the heat to maintain a temperature of 325°F, then fry the chicken in batches for 4-6 minutes until golden brown and the internal temperature reaches 160°F.
- Drain: Transfer the fried chicken to a wire cooling rack to allow excess oil to drip away without steaming the crust.
- Optional Double Fry: For extreme crispiness, let the chicken rest for 15 minutes or store in the fridge for up to 2 days. Reheat the oil to 400°F and fry each side for 1 minute until the crust is deeply golden and hard.
Pro Techniques for Maximum Crispiness
Use a Wire Cooling Rack to Prevent Sogginess
Placing fried chicken on paper towels often traps steam between the meat and the paper. This moisture softens the bottom of the crust. A wire rack allows air to circulate around the entire piece of chicken, keeping it crispy.
Maintain Constant Oil Temperature
Adding too many pieces of chicken at once will drop the oil temperature significantly. This causes the chicken to absorb more oil, resulting in a greasy texture. Fry in small batches to keep the oil consistently around 325°F.
The Importance of the Double Fry
The first fry cooks the interior and sets the crust. During the resting phase, moisture migrates from the meat to the crust. The second fry at 400°F evaporates this residual moisture, creating a shatteringly crisp exterior.
Pressing Flour Firmly into the Meat
Lightly dusting the chicken often leads to the breading sliding off during frying. Pressing the flour firmly into the marinated meat ensures the coating is thick and securely bonded. This results in those desirable craggy bits of crust.
Marinade Alternatives and Substitutions
Using Greek Yogurt as a Buttermilk Substitute
Plain Greek yogurt provides the necessary acidity to tenderize the chicken. To achieve the right consistency, whisk the yogurt with a tablespoon of water or milk until it reaches a pourable state. This maintains the viscous quality needed for the batter.
Making DIY Buttermilk with Vinegar or Lemon
If buttermilk is unavailable, mix one cup of whole milk with one tablespoon of white vinegar or lemon juice. Let the mixture sit for 5 to 10 minutes before using. The acid curdles the milk, mimicking the properties of real buttermilk.
Substituting Flour for Extra Crunch
Replacing a portion of the all-purpose flour with cornstarch or rice flour can increase the crunch. A ratio of 75% flour to 25% cornstarch creates a lighter, crispier shell. This prevents the crust from becoming too heavy or doughy.
Chicken Selection and Preparation
Why Boneless Skinless Thighs are Ideal
Thighs have a higher fat content than breasts, making them more forgiving during the frying process. They remain juicy even at the high temperatures required for a crispy crust. The boneless version ensures faster and more even cooking.
Adjusting for Bone-In Chicken Thighs
Bone-in thighs require a longer cooking time because the bone acts as an insulator. Increase the initial fry time by 3 to 6 minutes. Use a meat thermometer to ensure the area near the bone reaches at least 160°F.
Ensuring Consistent Piece Sizes
Trim any excessively large flaps of meat or fat from the thighs before marinating. Pieces of similar thickness will cook at the same rate. This prevents some pieces from overcooking while others remain raw in the center.
Oil Selection and Management
Choosing the Right High-Smoke Point Oil
Use oils with a high smoke point to prevent the oil from breaking down and tasting bitter. Canola, vegetable, peanut, and grapeseed oils are excellent choices. Avoid extra virgin olive oil, as it smokes at too low a temperature for deep frying.
Managing Oil Temperature with a Thermometer
Relying on bubbles to judge temperature is imprecise and can lead to burnt or greasy chicken. Use a digital probe thermometer or a candy thermometer for accuracy. Maintaining 325°F for the first fry is critical for internal doneness.
Filtering and Reusing Frying Oil
Neutral frying oil can be reused if filtered properly. Once cooled, pour the oil through a fine-mesh strainer lined with cheesecloth to remove burnt food particles. Store the filtered oil in a sealed container in a cool, dark place.
Storage and Reheating Guidelines
Refrigerating Fried Chicken
Store leftover chicken in an airtight container with a piece of paper towel to absorb excess moisture. Keep it in the refrigerator for up to 3 to 4 days. Ensure the chicken is completely cooled before sealing the container to prevent condensation.
Freezing for Long-Term Storage
Flash-freeze the chicken pieces on a baking sheet for one hour before transferring them to a freezer-safe bag. This prevents the pieces from sticking together. Frozen fried chicken can be kept for up to 3 months.
Using an Air Fryer for Reheating
The air fryer is the best tool for restoring the crunch of fried chicken. Heat the air fryer to 375°F and cook the chicken for 3 to 5 minutes. This evaporates surface moisture and reheats the interior without adding more oil.
Oven Reheating Method
Preheat the oven to 350°F and place the chicken on a wire rack set over a baking sheet. Heat for 10 to 15 minutes until warmed through. The rack is essential to prevent the bottom from becoming soggy in the oven.
Common Frying Troubleshooting
Breaded Crust Falling Off
This usually happens if the chicken is too wet when dredged or if the flour wasn’t pressed in firmly. Ensure excess marinade drips off before coating. Also, avoid stirring the chicken too much in the oil immediately after adding it.
Chicken Burnt Outside but Raw Inside
This occurs when the oil temperature is too high during the first fry. If the oil is above 350°F, the crust browns too quickly. Lower the heat to 325°F to allow the heat to penetrate the center of the thigh.
Excessively Greasy Chicken
Greasiness is a sign that the oil temperature dropped too low or the chicken was crowded in the pan. When the oil is too cool, the flour absorbs the fat instead of searing. Always fry in small batches and monitor the temperature.
Serving Suggestions
Classic Side Dish Pairings
Pair this chicken with a vinegar-based coleslaw to cut through the richness of the fried crust. Corn on the cob or mashed potatoes also complement the savory flavors. A side of steamed green beans provides a fresh, healthy balance.
Sauce Recommendations for Dipping
Honey mustard offers a sweet and tangy contrast to the salty crust. For a spicier option, mix mayonnaise with sriracha and a squeeze of lime. A simple drizzle of hot honey is also a popular modern addition.
Creating a Fried Chicken Sandwich
Place a hot thigh on a toasted brioche bun with sliced pickles and spicy mayo. Add shredded lettuce and a slice of tomato for extra texture. Press the bun slightly to integrate the flavors of the crust and sauces.
Frequently Asked Questions
Can I bake this instead of frying?
You can bake it at 400°F on a wire rack for 20-25 minutes, but it will not have the same thick, crispy crust as deep frying. To improve the result, spray the breaded chicken generously with oil before baking.
How long does the marinated chicken stay fresh?
Chicken can safely stay in the buttermilk marinade for up to 48 hours in the refrigerator. However, marinating beyond 24 hours can sometimes make the meat too soft due to the acid in the buttermilk.
Which oil is best for deep frying?
Peanut oil is often considered the best for frying due to its very high smoke point and neutral taste. However, canola or vegetable oil are widely available and work perfectly well for this recipe.
Can I use chicken breasts instead?
Yes, but breasts cook faster and dry out more easily than thighs. Reduce the frying time and check the internal temperature frequently to ensure they don’t overcook and become tough.
Print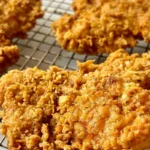
Crispy Buttermilk Fried Chicken Thighs
- Total Time: 1 hour 20 minutes
- Yield: 4 servings 1x
- Diet: General
Description
These Buttermilk Fried Chicken Thighs are no joke one of the best pieces of fried chicken I have ever made. The viscous buttermilk batter helps create an extra-thick crust that is brimming with spices and flavor.
Ingredients
- 2 tablespoons paprika
- 2 tablespoons ground black pepper
- 1 tablespoon onion powder
- 1 tablespoon garlic powder
- 1/2 teaspoon cayenne pepper
- 1 cup buttermilk
- 1 large egg
- 1 tablespoon coarse kosher salt
- 2 cups flour
- 2 teaspoons coarse kosher salt
- 3 pounds boneless skinless chicken thighs
- neutral oil (for frying)
Instructions
- Step 1: Combine the spice mixture ingredients in a small bowl.
- Step 2: Whisk the buttermilk, egg, salt, and 2 tablespoons of the spice mixture in a large bowl. Add the chicken and stir to coat everything. Try to keep most of the chicken submerged in the marinade. Refrigerate for at least one hour and up to overnight.
- Step 3: In a large bowl, whisk together the flour, two teaspoons of salt, and the remaining spice mixture. Add 3 tablespoons of the marinade from the large bowl and work it into the flour with your fingertips.
- Step 4: Working with one piece at a time, remove the chicken from the buttermilk brine, allowing the excess to drip back into the bowl. Dredge the chicken in the flour mixture. Make sure to press the flour firmly into the chicken so it sticks.
- Step 5: In a deep skillet, heat about 1 inch of oil to an initial temperature of 350°F. Add the chicken and try to maintain a temperature of about 325°F. Fry the chicken in batches for 4-6 minutes until both sides are golden brown and the inside reaches 160°F.
- Step 6: Transfer to a wire rack to drain excess oil. At this point, you can eat the chicken immediately, or double-fry it for an extra-crispy crust. To double-fry, let the chicken rest for at least 15 minutes or up to 2 days in the fridge. Reheat the oil to 400°F and fry each side of the chicken for 1 minute until super crispy.
Notes
Buttermilk Substitute: Substitute with yogurt or mix 1 tablespoon of vinegar or lemon juice with milk to make 1 cup.
- Prep Time: 10 minutes
- Cook Time: 10 minutes
- Category: Main Course
- Method: Deep Frying
- Cuisine: American
Nutrition
- Serving Size: 1 serving
- Calories: 718 kcal
- Sugar: 4 g
- Sodium: 2134 mg
- Fat: 18 g
- Saturated Fat: 5 g
- Unsaturated Fat: 10 g
- Trans Fat: 0.1 g
- Carbohydrates: 58 g
- Fiber: 4 g
- Protein: 77 g
- Cholesterol: 376 mg