Achieving perfectly grilled chicken with succulent meat and crisp, golden skin is a skill every home cook can master with the right approach. By utilizing a dual-zone heating method, you ensure that every piece of chicken cooks evenly without charring before the center is ready. This straightforward technique works consistently for breasts, thighs, and drumsticks, making it a reliable staple for your outdoor cooking repertoire.
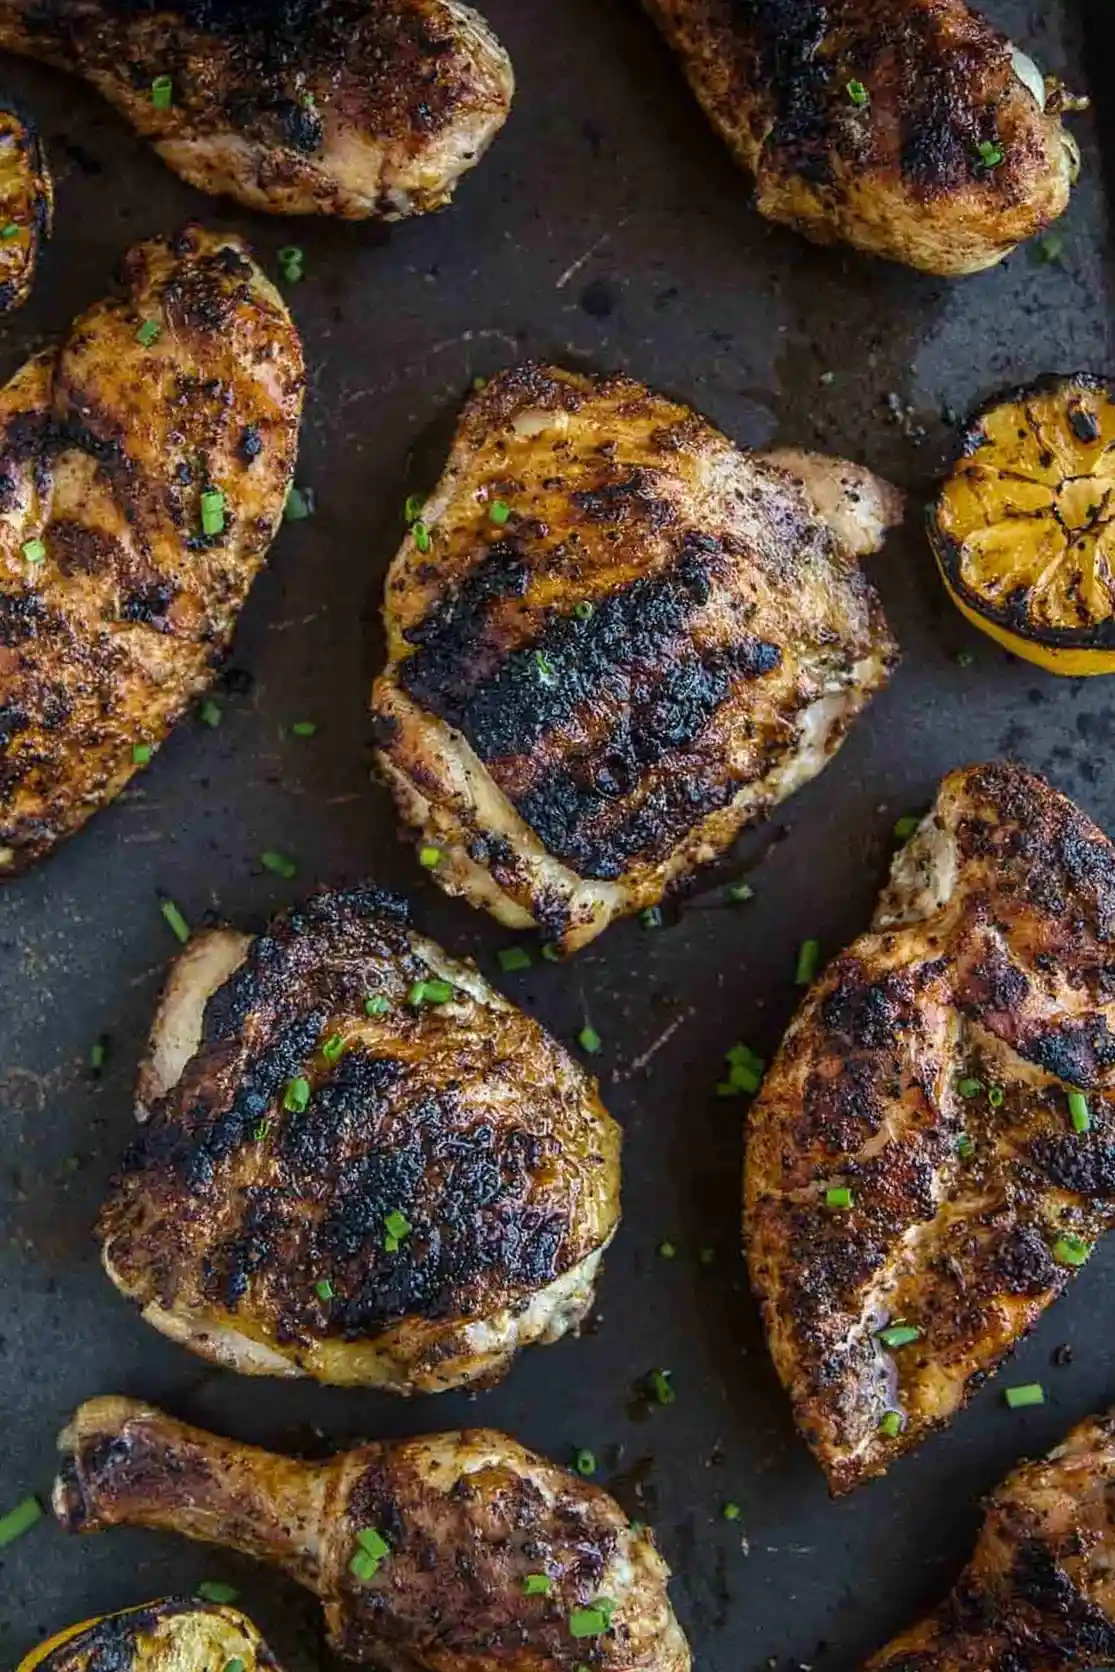
List of ingredients
- ¼ cup chicken seasoning
- 2 tablespoons extra virgin olive oil
- 2 pieces chicken breasts, bone-in
- 2 pieces chicken thighs
- 2 pieces chicken legs
step-by-step instructions
- Season: Prior to grilling, pat dry the chicken, coat with olive oil and season liberally. Cover and place back into fridge until ready to grill. For best results, do this one day in advance.
- Prep Grill: Prepare the grill for direct/indirect method of cooking, and remove the chicken from the refrigerator. Target 475 to 500 degrees F in the cooking chamber.
- Grill Direct: Place the chicken pieces over direct heat. Cook each side for approximately 5 minutes, or until you see the desired crust, and then move to indirect heat to finish cooking, turning each piece occasionally.
- Grill Indirect: Continue cooking until the internal temperature of the breast is 155 degrees F as measured on an instant read thermometer. Pull and let rest for 15 minutes. For thighs and legs cook until the internal temperature reaches 175 degrees. Rest 10 minutes then serve.
- Serve: Serve and enjoy.
Mastering the Two-Zone Grilling Technique
The secret to professional-level grilled poultry is mastering the dual-zone setup. By creating a side of the grill with intense direct heat and a side with indirect heat, you gain total control over the cooking process. You use the high-heat zone to develop flavor and texture, while the cooler side allows the meat to reach a safe, succulent internal temperature without burning the exterior.
Why Two-Zone Heat Prevents Charring
When you leave chicken over high heat for the entire cooking duration, the sugar or fats in the skin can scorch long before the interior is safe to eat. Shifting the meat to the indirect side acts like an oven, gently circulating heat around the chicken. This approach guarantees that you never have to choose between raw centers and burnt skin.
Managing Flare-Ups During Searing
Flare-ups occur when rendered fat drips onto hot coals or burner covers, creating sudden bursts of flame that can deposit soot on your food. Keeping the chicken on the direct-heat side only during the initial searing phase minimizes these incidents. If a flare-up occurs, having the indirect side ready allows you to move the meat to a safe haven immediately until the flames subside.
Selecting and Preparing Your Chicken Cuts
Choosing the right cuts significantly impacts your final results. While many people gravitate toward boneless breasts, bone-in options are much more forgiving for outdoor grilling. The bone insulates the meat from the intense heat, helping to maintain a juicy texture that is difficult to achieve with boneless cuts.
Trimming and Shaping for Uniformity
Even if you choose bone-in pieces, taking a moment to trim excess loose skin or fat is a helpful step. Use a sharp pair of kitchen shears to tidy up the edges, which prevents greasy drips and makes the final presentation much cleaner. If you must use boneless, skinless breasts, use a kitchen mallet to pound them to an even thickness before marinating so they cook at the same rate as the legs and thighs.
The Role of Dry Brining
Applying salt-based seasonings to your chicken well in advance is called dry brining. Over time, the salt draws out moisture, dissolves into a brine, and is then reabsorbed into the meat. This process fundamentally improves the final texture and seasoning depth of the bird, ensuring that the flavor permeates the meat rather than just resting on the surface.
Understanding Temperature and Doneness
Relying on a timer is one of the most common mistakes made when grilling poultry. Because every grill performs differently and every cut of chicken varies in size, an instant-read thermometer is your most important piece of equipment. It is the only way to guarantee safety while ensuring the best possible texture for both white and dark meat.
Where to Insert the Probe
Always insert your thermometer probe into the thickest part of the meat, being careful to avoid hitting the bone. Bone conducts heat faster than muscle tissue, which can give you a false, high reading if the probe touches it. For the most accurate results, slowly move the probe through the thickest section of the breast or thigh until you find the lowest reading, which represents the true internal temperature.
Why Different Cuts Require Different Temperatures
Chicken breasts are lean and tend to dry out if cooked beyond 160 degrees. Conversely, thighs and legs contain more connective tissue and intramuscular fat, which require more time to break down. Cooking thighs and legs to 175 degrees allows the collagen to soften, resulting in a much more enjoyable mouthfeel than if they were pulled at the same time as the breasts.
Practical Maintenance for Your Grill
Keeping your equipment in good working order is essential for consistent results. A grill that is cluttered with debris from a previous meal can lead to uneven heat distribution and bitter flavors. Developing a routine for grill maintenance ensures that every time you light the coals or turn on the gas, you are starting from a clean slate.
Removing Debris Before Cooking
Always brush your grates thoroughly before preheating. Once the grill reaches temperature, use a wire brush or a heavy-duty scraper to remove any carbonized food remnants from previous sessions. This prevents old residue from sticking to your fresh chicken and helps ensure a beautiful sear.
Oil Treatment for Clean Grilling
After your grates are clean, applying a very thin layer of high-smoke-point oil can prevent sticking. Use a folded paper towel dipped in oil and held with long tongs to coat the grates right before placing the chicken. This creates a non-stick barrier that makes turning the pieces much easier during the grilling process.
Commonly Asked Questions
Can I grill chicken using only a gas grill?
Yes, the two-zone method works perfectly on a gas grill. Simply turn off one or more burners to create the indirect zone while keeping the other burners set to medium-high to maintain the direct sear zone. Ensure your lid is kept closed during the indirect cooking phase to maintain a steady ambient temperature.
What is the benefit of letting the chicken rest?
Resting allows the muscle fibers to relax and reabsorb the juices that are pushed to the center by the heat of the grill. If you cut into the chicken immediately after pulling it off the heat, those juices will run out onto your cutting board, leaving the meat dry. Always allocate at least 10 to 15 minutes for the best result.
How do I make the skin crispier without burning it?
Ensure the chicken is patted completely dry before adding any oil or seasoning. Moisture on the skin is the enemy of crispiness because it must evaporate before the fat can properly render and brown. Additionally, avoid overcrowding the grill, which traps steam and prevents the skin from achieving a brittle, golden finish.
Is it necessary to remove the skin?
Removing the skin is a matter of personal preference, but it significantly changes the cooking process. Without the skin to act as a barrier and a source of rendered fat, the meat is more prone to drying out. If you prefer cooking without skin, consider using a slightly lower heat and brushing the meat with olive oil periodically to maintain moisture.
What should I do if the chicken is brown on the outside but raw inside?
This is usually a sign that your direct heat was too intense or your indirect zone is not hot enough. If you notice this happening, move the pieces to the indirect zone, keep the lid tightly closed, and allow the ambient heat to finish the cooking. You can also move the pieces further away from the direct heat source until the center reaches the proper target temperature.
Print
How To Grill Perfect Chicken
- Total Time: 30 minutes
- Yield: 4 people 1x
- Diet: High Protein
Description
How to make perfect Grilled Chicken every time, with any cut of chicken. This fool proof method will get you great flavor, crispy skin, and juicy texture for the best chicken ever.
Ingredients
- ¼ cup chicken seasoning
- 2 tablespoons extra virgin olive oil
- 2 pieces chicken breasts, bone-in
- 2 pieces chicken thighs
- 2 pieces chicken legs
Instructions
- Season: Prior to grilling, pat dry the chicken, coat with olive oil and season liberally. Cover and place back into fridge until ready to grill. For best results, do this one day in advance.
- Prep Grill: Prepare the grill for direct/indirect method of cooking, and remove the chicken from the refrigerator. Target 475 to 500 degrees F in the cooking chamber.
- Grill Direct: Place the chicken pieces over direct heat. Cook each side for approximately 5 minutes, or until you see the desired crust, and then move to indirect heat to finish cooking, turning each piece occasionally.
- Grill Indirect: Continue cooking until the internal temperature of the breast is 155 degrees F as measured on an instant read thermometer. Pull and let rest for 15 minutes. For thighs and legs cook until the internal temperature reaches 175 degrees. Rest 10 minutes then serve.
- Serve: Serve and enjoy.
Notes
Marinate for at least 4 hours and up to 24 hours. If glazing, apply when the chicken reaches 150 degrees F (breast) or 170 degrees F (thighs/legs) using a silicone brush.
- Prep Time: 10 minutes
- Cook Time: 20 minutes
- Category: Entree
- Method: Grilling
- Cuisine: American
Nutrition
- Serving Size: 1 piece
- Calories: 320 kcal
- Sugar: 0 g
- Sodium: 450 mg
- Fat: 18 g
- Saturated Fat: 5 g
- Unsaturated Fat: 12 g
- Trans Fat: 0 g
- Carbohydrates: 2 g
- Fiber: 0 g
- Protein: 35 g
- Cholesterol: 110 mg