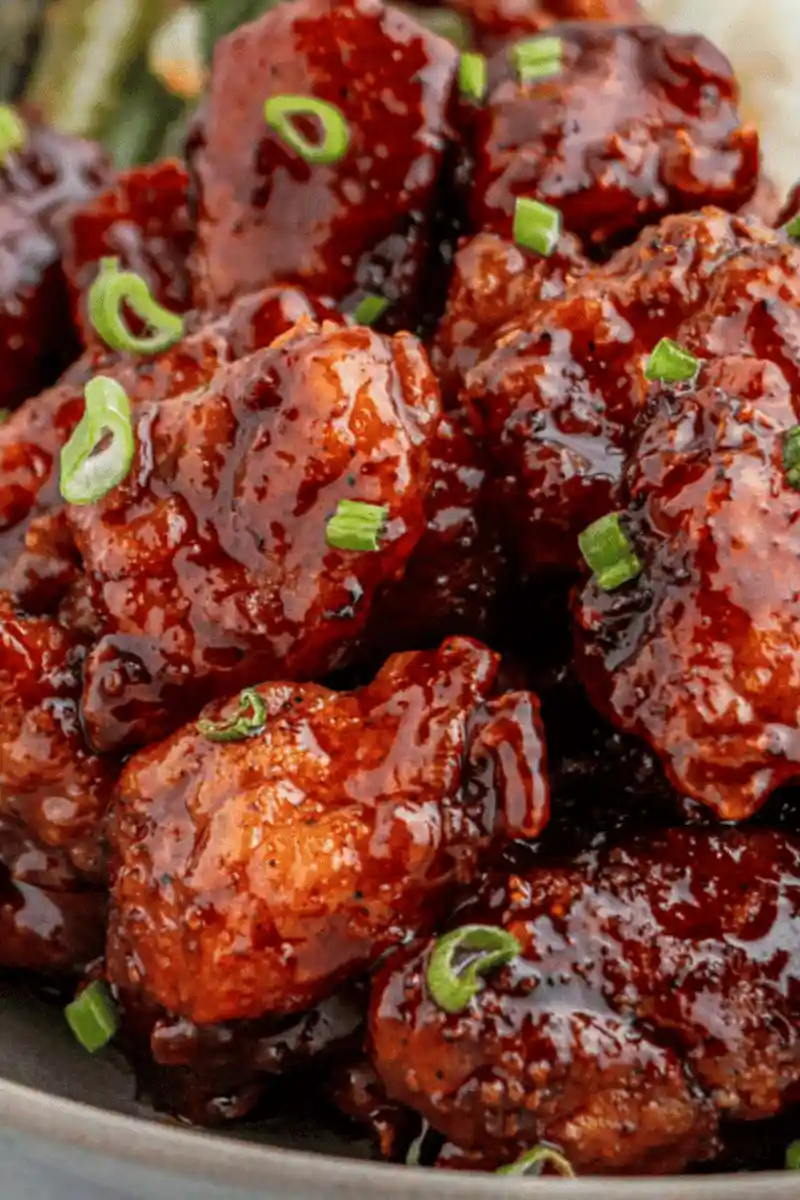
Honey butter chicken is a delightful main course that masterfully balances a rich, savory coating with a touch of sweetness. This dish is perfect for busy weeknights, offering restaurant-quality results in less than thirty minutes. The crispy texture of the pan-seared chicken paired with the thick, velvety glaze creates an unforgettable meal.
List of ingredients
- 1/4 cup all-purpose flour
- 1/2 tsp garlic powder
- 1/4 tsp cayenne pepper
- 1/2 tsp onion powder
- 1 tsp salt
- 1/4 tsp ground black pepper
- 1 lb chicken breasts, cut into 1 inch pieces
- 1 tbsp unsalted butter
- 1 tbsp canola oil
- 1 tbsp green onions, sliced
- 5 tbsps butter, room temperature
- 1/2 cup honey
- 1 tbsp soy sauce
- 1 tbsp apple cider vinegar
- 1/4 tsp salt
- 1/8 tsp ground black pepper
step-by-step instructions
- Step: Combine the flour, garlic powder, cayenne pepper, onion powder, salt, and ground black pepper in a large bowl. Add the chicken pieces to the flour mixture and mix until thoroughly coated.
- Step: Melt 1 tbsp butter with the oil in a large cast iron skillet over medium heat. Add the chicken in a single layer and fry for 2-3 minutes on each side until golden brown. Remove chicken from the pan and set aside.
- Step: Turn the heat to low and add the remaining 5 tbsps butter to the skillet. Once melted, stir in the honey, soy sauce, apple cider vinegar, 1/4 tsp salt, and 1/8 tsp pepper.
- Step: Continue stirring over low heat until the sauce reaches a smooth, caramel-like thickness.
- Step: Add the chicken back into the pan, tossing until completely coated. Turn off the heat and let the chicken rest for 5 minutes before serving. Garnish with sliced green onions.
Refining Your Pan-Seared Chicken
Achieving Maximum Crispiness
To ensure your chicken pieces remain crispy, focus on moisture control before the flour hits the meat. Gently pat your cubed chicken breasts dry with paper towels before tossing them in the flour mixture. This prevents the flour from turning into a gummy paste, allowing it to adhere better for a superior, crunchier crust.
Selecting the Right Pan for the Sear
A heavy-bottomed or cast-iron skillet is highly recommended for this recipe. These materials retain heat exceptionally well, which is vital for achieving a hard sear on the chicken pieces without drying them out. A thin pan can lead to inconsistent browning and may cause the butter-oil mixture to heat unevenly.
Managing Pan Capacity
Overcrowding the skillet is the primary cause of soggy, pale chicken. If your pan is small, cook the chicken in two separate batches rather than trying to fit it all at once. Maintaining space between the pieces allows steam to escape efficiently, which is necessary for creating the desired golden-brown finish.
Perfecting the Honey Glaze
Balancing Sweetness and Acidity
The apple cider vinegar is not optional; it acts as a crucial balancer for the sugar in the honey. If you find the sauce is too sweet for your personal taste, you can add an extra half-teaspoon of vinegar. This acidity brightens the dish and makes the complex flavors of the glaze feel more professional and balanced.
Monitoring Sauce Thickness
Honey is highly sensitive to heat and can change from perfectly thickened to burnt in mere seconds. Use a low setting on your stovetop and watch for the moment the bubbles start to look tight and syrupy. If the sauce becomes too thick, a splash of water or extra vinegar can help loosen it back to a pourable, glazy state.
Serving Ideas for Complete Meals
Choosing the Right Starch
Because the honey butter sauce is rich and sticky, a mild, absorbent base is the ideal pairing. Steamed white rice, jasmine rice, or even a basic risotto provide a neutral canvas that doesn’t compete with the chicken. Avoid overly seasoned sides so the primary flavors of the honey and soy can shine.
Adding Fresh, Vibrant Sides
To counteract the richness of the butter and honey, incorporate fresh, slightly bitter, or crunchy green vegetables. Steamed snap peas, charred asparagus with lemon zest, or quick-sautéed kale work beautifully. These vegetables provide a textural contrast that makes the overall meal feel much more substantial and nutritionally balanced.
Managing Leftovers and Storage
Maintaining Quality During Storage
Store any leftover chicken in an airtight container in the refrigerator for up to four days. To preserve the best texture, store the chicken and any excess sauce separately if possible. If they are already mixed, recognize that the crispy coating will naturally soften over time as it sits in the liquid glaze.
Reheating for Best Texture
Avoid the microwave if you want to retain any sense of the original crispiness. Instead, place the chicken in a cold oven and let it heat up as the oven reaches 350°F, or place the pieces in a dry skillet over medium-low heat. Adding a tiny pat of fresh butter right at the end of reheating can help restore a glossy finish to the sauce.
Freezing Guidelines
While you can freeze this dish for up to three months, it is best to freeze the chicken and sauce separately. If combined, the sauce may become slightly grainy upon thawing. Always thaw your chicken in the refrigerator overnight rather than at room temperature to ensure safety and quality.
Common Kitchen Questions
Can I substitute chicken thighs for breasts?
Yes, chicken thighs are an excellent alternative and actually offer more moisture than breasts. Just ensure you remove any excess fat before cutting them into uniform, 1-inch pieces to match the cooking time of the original recipe.
Why does the chicken taste a bit too salty?
The combination of soy sauce, added salt in the flour, and additional salt in the glaze can be intense. If you prefer a lower sodium intake, start by using low-sodium soy sauce and omitting the extra salt from the honey butter glaze portion of the ingredients list.
Is there a way to make this spicier?
You can easily increase the heat by adding a pinch of crushed red pepper flakes to the sauce while it simmers. A small amount of chili paste, such as sambal oelek, also works well, provided it does not contain forbidden ingredients, and it integrates nicely into the honey butter base.
Print
Honey Butter Chicken
- Total Time: PT20M
- Yield: 4 servings 1x
- Diet: High Protein
Description
Sweet, sticky, and bursting with flavor, this Honey Butter Chicken is an easy weeknight dinner that will be on the table in under 30 minutes!
Ingredients
- 1/4 cup all-purpose flour
- 1/2 tsp garlic powder
- 1/4 tsp cayenne pepper
- 1/2 tsp onion powder
- 1 tsp salt
- 1/4 tsp ground black pepper
- 1 lb chicken breasts, cut into 1 inch pieces
- 1 tbsp unsalted butter
- 1 tbsp canola oil
- 1 tbsp green onions, sliced
- 5 tbsps butter, room temperature
- 1/2 cup honey
- 1 tbsp soy sauce
- 1 tbsp apple cider vinegar
- 1/4 tsp salt
- 1/8 tsp ground black pepper
Instructions
- Step: Combine the flour, garlic powder, cayenne pepper, onion powder, salt, and ground black pepper in a large bowl. Add the chicken pieces to the flour mixture and mix until thoroughly coated.
- Step: Melt 1 tbsp butter with the oil in a large cast iron skillet over medium heat. Add the chicken in a single layer and fry for 2-3 minutes on each side until golden brown. Remove chicken from the pan and set aside.
- Step: Turn the heat to low and add the remaining 5 tbsps butter to the skillet. Once melted, stir in the honey, soy sauce, apple cider vinegar, 1/4 tsp salt, and 1/8 tsp pepper.
- Step: Continue stirring over low heat until the sauce reaches a smooth, caramel-like thickness.
- Step: Add the chicken back into the pan, tossing until completely coated. Turn off the heat and let the chicken rest for 5 minutes before serving. Garnish with sliced green onions.
Notes
The more room you leave in between each piece of chicken in the pan, the crispier it will get.
- Prep Time: PT5M
- Cook Time: PT15M
- Category: Main Course
- Method: Pan-Frying
- Cuisine: American
Nutrition
- Serving Size: 1 serving
- Calories: 503 kcal
- Sugar: 35 g
- Sodium: 1225 mg
- Fat: 24 g
- Saturated Fat: 12 g
- Unsaturated Fat: 10 g
- Trans Fat: 0 g
- Carbohydrates: 48 g
- Fiber: 1 g
- Protein: 27 g
- Cholesterol: 118 mg