This honey butter chicken is a quick, savory-sweet dinner ready in under 30 minutes. It combines crispy pan-seared chicken pieces with a rich, sticky glaze for a satisfying meal.
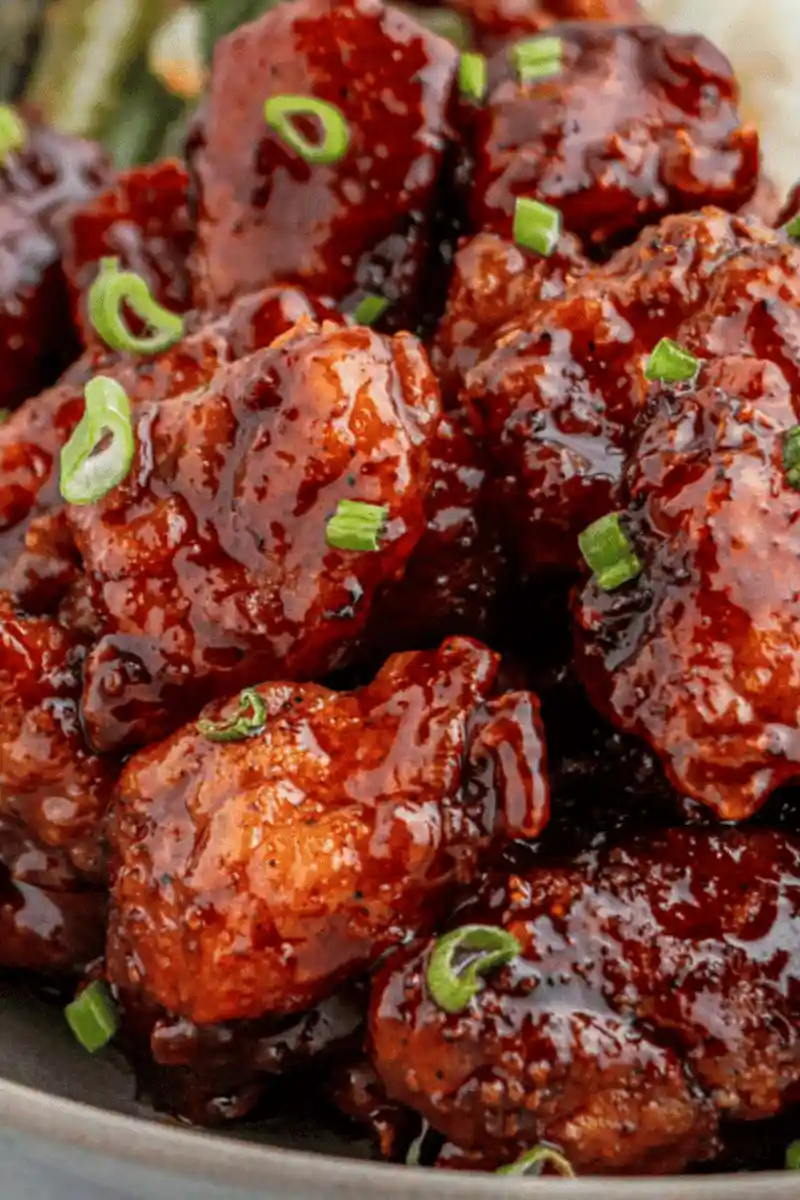
List of ingredients
- 1/4 cup all-purpose flour – used for dredging the chicken.
- 1/2 tsp garlic powder – adds a savory depth.
- 1/4 tsp cayenne pepper – provides a subtle heat.
- 1/2 tsp onion powder – enhances the savory profile.
- 1 tsp salt – seasons the flour coating.
- 1/4 tsp ground black pepper – adds a mild spice.
- 1 lb chicken breasts – cut into 1 inch pieces for even cooking.
- 1 tbsp unsalted butter – used for frying.
- 1 tbsp canola oil – or any light oil to increase the smoke point.
- 1 tbsp green onions – sliced for a fresh garnish.
- 5 tbsps butter – room temperature, for the sauce.
- 1/2 cup honey – the primary sweetener for the glaze.
- 1 tbsp soy sauce – adds saltiness and umami.
- 1 tbsp apple cider vinegar – balances the sweetness with acidity.
- 1/4 tsp salt – adjusts the sauce seasoning.
- 1/8 tsp ground black pepper – final seasoning for the sauce.
step-by-step instructions
- Prepare the Coating: Combine the all-purpose flour, garlic powder, cayenne pepper, onion powder, salt, and ground black pepper in a large bowl. Add the chicken pieces and toss until every piece is thoroughly coated, then shake off any excess flour.
- Sear the Chicken: Melt the 1 tablespoon of butter and canola oil in a large cast iron skillet over medium heat. Place the chicken pieces in a single layer, ensuring they do not touch, and fry for 2-3 minutes per side until golden brown.
- Drain the Meat: Remove the cooked chicken from the skillet and place the pieces on a paper towel-lined plate to maintain crispiness while preparing the sauce.
- Simmer the Glaze: Reduce the heat to low and add the 5 tablespoons of room temperature butter to the same skillet. Once melted, stir in the honey, soy sauce, apple cider vinegar, salt, and ground black pepper.
- Thicken the Sauce: Continue stirring the mixture over low heat until the sauce reaches a smooth, caramel-like thickness.
- Combine and Finish: Add the fried chicken back into the skillet and stir until every piece is completely covered in the honey butter glaze.
- Rest and Serve: Turn off the heat and let the chicken rest in the pan for 5 minutes to allow the flavors to meld. Transfer to a platter, garnish with sliced green onions, and serve.
Optimal Cooking Techniques
Dry the Chicken Before Coating
Pat the chicken breast pieces dry with a paper towel before adding them to the flour mixture. Removing surface moisture prevents the flour from clumping and helps the coating adhere more effectively for a crispier finish.
Avoid Overcrowding the Pan
Cook the chicken in batches if your skillet is not large enough to hold a single layer with space between pieces. Overcrowding lowers the temperature of the pan, causing the chicken to steam rather than sear, which results in a soggy crust.
Maintain Low Heat for the Sauce
Keep the heat on low when simmering the honey and butter mixture. Honey has a high sugar content and can burn quickly if the temperature is too high, which would introduce a bitter taste to the glaze.
Use a Heavy-Bottomed Skillet
A cast iron skillet is ideal because it distributes heat evenly and retains temperature well. This ensures that the chicken browns consistently across all sides without creating hot spots that might burn the flour coating.
Ingredient Substitutions and Modifications
Use Chicken Thighs for Added Moisture
If you prefer a juicier texture, replace the chicken breasts with boneless, skinless chicken thighs. Thighs have a higher fat content and are more forgiving during the searing process, making them less likely to overcook.
Swap Canola Oil for Avocado Oil
Avocado oil is an excellent substitute for canola oil due to its very high smoke point. This is particularly useful if you prefer to sear the chicken at a slightly higher temperature to achieve a deeper golden brown color.
Replace Soy Sauce with Tamari
For those avoiding wheat, tamari is a suitable replacement for soy sauce that provides a similar salty, umami flavor. Use the same 1 tablespoon measurement to maintain the balance of the honey butter sauce.
Adjust Heat Levels with Cayenne
If you prefer a spicier dish, increase the cayenne pepper in the flour mixture to 1/2 teaspoon. Conversely, you can omit the cayenne entirely if you want a strictly sweet and savory flavor profile for children.
Serving and Pairing Suggestions
Pair with Steamed Jasmine Rice
The neutral, floral notes of jasmine rice provide a perfect base for the sticky honey butter sauce. Serving the chicken over rice allows the extra glaze to soak into the grains, ensuring no flavor is wasted.
Serve with Sautéed Green Beans
Fresh green beans sautéed with a bit of garlic and salt offer a crisp, fresh contrast to the richness of the butter sauce. The bitterness of the greens helps cut through the sweetness of the honey.
Combine with Garlic Mashed Potatoes
For a more hearty meal, serve the chicken alongside creamy garlic mashed potatoes. The savory nature of the potatoes complements the sweet glaze, creating a balanced and filling dinner.
Add a Fresh Asparagus Salad
A chilled asparagus salad with a light lemon vinaigrette provides an acidic counterpoint to the dish. The brightness of the lemon helps cleanse the palate between bites of the rich honey butter chicken.
Storage and Meal Prep Guide
Refrigerator Storage Process
Allow the cooked chicken to cool to room temperature before transferring it to an airtight container. Store it in the refrigerator for up to 3 to 4 days to maintain freshness and quality.
Freezing the Finished Dish
You can freeze the honey butter chicken for up to 3 months by using a freezer-safe container or vacuum-sealed bag. Ensure the chicken is completely cooled before freezing to prevent the formation of ice crystals.
Proper Thawing Method
To maintain the best texture, thaw frozen chicken in the refrigerator overnight. Avoid thawing at room temperature to ensure the meat stays safe and the sauce does not separate.
Reheating for Best Texture
Oven Reheating Instructions
Place the chicken on a baking sheet and heat at 350°F for 10 to 15 minutes. This method helps the coating regain some of its crispness compared to microwave reheating.
Skillet Reheating Method
Heat a cast iron skillet over medium-low heat and add the chicken with a lid. This traps the steam and warms the chicken through while preventing the glaze from drying out.
Preventing Dryness During Reheating
Drizzle a small amount of extra honey or a thin slice of butter over the chicken before reheating. This adds moisture back into the glaze, preventing the sauce from becoming too sticky or hard.
Common Troubleshooting Solutions
Fixing a Sauce That Is Too Thin
If the sauce has not reached a caramel-like consistency, continue simmering on low heat for another 2 to 3 minutes. Constant stirring is essential during this phase to prevent the honey from scorching.
Preventing the Honey from Burning
If the sauce begins to bubble too aggressively or smells toasted, remove the skillet from the heat immediately. You can stir in a teaspoon of water or apple cider vinegar to lower the temperature and stabilize the sauce.
Stopping Chicken from Sticking
Ensure the butter and oil are shimmering before adding the chicken to the pan. If the chicken sticks, avoid forcing it off the pan; let it sear for another minute, and it will naturally release once a crust has formed.
Frequently Asked Questions
Can I use honey alternatives?
Maple syrup can be used as a substitute for honey, although it will change the flavor profile and may require a slightly longer simmering time to thicken.
How do I make the chicken crispier?
Double-dredge the chicken by dipping it in flour, then oil, then flour again. Additionally, ensuring the pan is sufficiently hot before adding the meat is crucial for a crisp sear.
Is this recipe suitable for meal prep?
Yes, this recipe is excellent for meal prep as it stays flavorful when refrigerated. It is best paired with a sturdy grain like brown rice or quinoa to maintain texture over several days.
Print
Crispy Honey Butter Chicken
- Total Time: 20 minutes
- Yield: 4 servings 1x
- Diet: General
Description
Sweet, sticky, and bursting with flavor, this Honey Butter Chicken is an easy weeknight dinner that will be on the table in under 30 minutes!
Ingredients
- 1/4 cup all-purpose flour
- ½ tsp garlic powder
- ¼ tsp cayenne pepper
- ½ tsp onion powder
- 1 tsp salt
- ¼ tsp ground black pepper
- 1 lb chicken breasts, cut into 1 inch pieces
- 1 tbsp unsalted butter
- 1 tbsp canola oil
- 1 tbsp green onions, sliced
- 5 tbsps butter, room temperature
- ½ cup honey
- 1 tbsp soy sauce
- 1 tbsp apple cider vinegar
- ¼ tsp salt
- ⅛ tsp ground black pepper
Instructions
- Prepare: Combine the flour, garlic powder, cayenne pepper, onion powder, salt, and ground black pepper in a large bowl. Add the chicken pieces to the flour mixture and mix until it is thoroughly coated.
- Fry: Melt the butter with the oil in a large cast iron skillet over medium heat, then add the chicken, shaking off the excess flour, in a single layer. Fry the chicken for 2-3 minutes on each side, or until golden brown on both sides, then remove and set aside.
- Sauce: Turn the heat down to low and add the remaining butter to the skillet. Once melted, add the honey, soy sauce, apple cider vinegar, salt, and ground black pepper.
- Glaze: Stir over low heat until the sauce reaches a smooth caramel-like thickness. Add and mix in the chicken until completely covered. Turn off the heat and let cool for 5 minutes. Garnish with green onions before serving.
Notes
The more room you leave in between each piece of chicken in the pan, the crispier it will get!
- Prep Time: 5 minutes
- Cook Time: 15 minutes
- Category: Main Course
- Method: Pan-frying
- Cuisine: American
Nutrition
- Serving Size: 1 serving
- Calories: 503 kcal
- Sugar: 35 g
- Sodium: 1225 mg
- Fat: 24 g
- Saturated Fat: 12 g
- Unsaturated Fat: 10 g
- Trans Fat: 1 g
- Carbohydrates: 48 g
- Fiber: 1 g
- Protein: 27 g
- Cholesterol: 118 mg