Achieving the perfect balance of shatteringly crisp skin and succulent, flavorful meat is remarkably simple with this roasted chicken thigh method. By utilizing high-heat roasting and a few strategic preparation techniques, you can transform humble chicken thighs into a restaurant-quality main course. This recipe is designed for maximum efficiency, making it an ideal candidate for busy weeknight dinners or casual weekend gatherings.
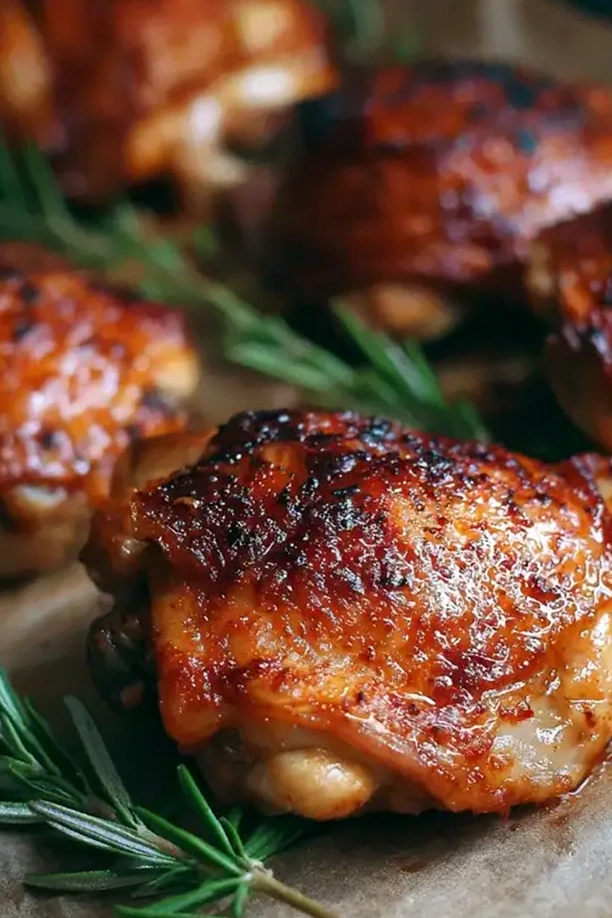
List of ingredients
- 6 bone-in, skin-on chicken thighs
- 2 tablespoons olive oil or avocado oil
- 1 ½ teaspoons kosher salt
- 1 teaspoon freshly ground black pepper
- 1 teaspoon garlic powder
- ½ teaspoon smoked paprika
- Fresh herbs like thyme or rosemary sprigs
- 1 lemon, cut into wedges
step-by-step instructions
- Step: Preheat your oven to a roaring 425°F (220°C). While it heats up, take your chicken thighs and pat them completely dry with paper towels—get every bit of moisture off that skin. This is your crispy-skin secret weapon. Place them on a plate and drizzle with the olive oil, rubbing it all over both sides.
- Step: In a small bowl, mix together the kosher salt, black pepper, garlic powder, and smoked paprika if you’re using it. Sprinkle this seasoning mix generously over both sides of the chicken thighs, but really focus on getting a good, even layer on the skin side. Don’t just dust it—massage it in a little.
- Step: Now, grab your oven-safe skillet. You don’t need to add any extra oil. Place the chicken thighs in the skillet, skin-side up, making sure they aren’t crowded. A little space between them allows for better hot air circulation, which means crispier skin all around. If you have fresh herbs, tuck a few sprigs around the chicken.
- Step: Slide the skillet right into the preheated oven. The sizzle you might hear is a very good sign. Roast, undisturbed, for 30-35 minutes. You’ll know they’re done when the skin is deep golden brown and crispy, and the internal temperature registers 165°F (74°C) at the thickest part, not touching the bone. The juices should run clear.
- Step: This is a crucial step for the texture: once you pull the skillet from the oven, let the chicken rest for about 5-10 minutes before serving. This allows the frantic juices to relax and redistribute back throughout the meat, ensuring every single bite is moist and flavorful. Squeeze fresh lemon juice over the top right before serving for a bright, zesty finish.
Refining Your Roasting Technique
Maintaining Proper Airflow in the Pan
Avoid the common mistake of overcrowding your roasting vessel, as this traps moisture and creates a steaming environment. When chicken pieces touch, they prevent heat from hitting the sides of the skin, resulting in soft or rubbery spots. Maintain at least one inch of space between each thigh to ensure the convection currents of the oven can effectively crisp the skin all the way around.
Selecting the Right Pan for Even Cooking
A heavy-duty cast iron skillet is the most effective tool for this recipe because it retains and radiates high heat consistently. This thermal mass helps sear the bottom of the chicken skin if there is any contact with the pan surface, contributing to a more even golden finish. If a cast iron skillet is unavailable, a rimmed heavy-gauge baking sheet is an acceptable alternative.
Customizing Your Flavor Profile
Exploring Dried Spice Blends
While the combination of garlic powder and smoked paprika provides a reliable flavor base, feel free to experiment with other dry seasonings. Onion powder, ground coriander, or a pinch of dried oregano can add complexity to the spice rub. Ensure you do not add sugary spice blends before roasting, as these are prone to burning during the 30-minute high-heat cycle.
Incorporating Fresh Aromatics
Adding aromatics to the skillet during the final 10 minutes of cooking can infuse the pan drippings with additional character. Shallots, halved heads of garlic, or small chunks of root vegetables like carrots can be tucked into the gaps around the chicken thighs. These items will roast in the rendered chicken fat, becoming tender and savory as the meat finishes.
Serving Suggestions and Menu Planning
Building a Balanced Plate
Because the chicken thighs are naturally rich, they pair excellently with side dishes that provide textural or acidic contrast. Creamy starches like mashed potatoes or polenta absorb the flavorful pan juices, while roasted cruciferous vegetables like broccoli or Brussels sprouts offer a satisfying crunch. These pairings ensure your plate provides a variety of sensations in every bite.
Refreshing Liquid Accompaniments
To cleanse the palate after consuming the crispy, seasoned skin, consider beverages with bright, zesty profiles. Sparkling water with a splash of cranberry or a chilled glass of dry, crisp apple cider works well to cut through the rendered fats. These choices keep the overall meal experience light and refreshing.
Storage and Reheating Advice
Maintaining Texture During Storage
To store leftover roasted chicken, place it in an airtight container once it has cooled to room temperature. It will remain safe and flavorful in the refrigerator for up to four days. If you anticipate keeping it longer, remove the meat from the bone before freezing to save space and streamline future meal preparation.
Restoring Crispy Skin After Cooling
The microwave is the least desirable method for reheating leftover chicken because it causes the skin to lose its integrity and become soggy. For the best results, use an oven or a toaster oven set to 375°F for 10 to 12 minutes. This method gently heats the meat through while allowing the skin to regain some of its original crispiness.
Addressing Common Cooking Hurdles
What to Do If the Skin Is Not Crisping
If after 30 minutes your chicken is cooked through but the skin remains pale, you may not have dried the meat sufficiently or your oven temperature may be inaccurate. Increase the oven temperature to 450°F or switch to the broiler setting for the final 2 to 3 minutes of cooking. Monitor the chicken very closely during this time, as the high heat can lead to rapid burning.
Understanding Rendering and Fat Management
Chicken thighs contain a significant amount of subcutaneous fat that needs to be properly rendered during the roasting process. If you notice a large amount of excess liquid in the bottom of your skillet, it is simply rendered fat mixed with small amounts of moisture. You can carefully drain this excess fat or use it to roast small portions of diced potatoes for a decadent side dish.
Frequently Asked Questions
Can I remove the bone for faster cooking?
While you can debone the thighs, the bone-in preparation is recommended because it insulates the meat during high-heat roasting, preventing it from drying out. If you choose to use boneless thighs, reduce the cooking time by approximately 5 to 8 minutes to avoid overcooking.
Is it necessary to use a thermometer?
Using an instant-read thermometer is the only way to be 100% certain that the chicken is safely cooked without overshooting the mark. It provides peace of mind and prevents the guesswork associated with visual cues like juice color, which can sometimes be misleading depending on the seasoning used.
Should I wash the chicken before seasoning?
It is strongly advised against washing or rinsing raw poultry under running water. This practice does not clean the meat effectively and instead increases the risk of spreading bacteria throughout your kitchen workspace via water droplets. Simply pat the surface dry with paper towels to prepare it for roasting.
Can I prepare the seasoning in advance?
Yes, you can mix your dry rub spices ahead of time and store them in an airtight spice jar. Having this pre-mixed blend on hand makes the preparation for a quick weeknight dinner even faster, as you only need to coat the chicken and place it in the oven.
Does the type of oil matter for the skin?
Using a neutral oil with a high smoke point, such as avocado oil, is ideal for high-heat roasting. Olive oil is also excellent, provided it is extra virgin or standard olive oil, which can easily withstand the 425°F oven temperature without burning. Avoid oils with low smoke points like extra-virgin flaxseed or delicate nut oils.
Print
Perfectly Roasted Chicken Thighs
- Total Time: 40 minutes
- Yield: 3 servings 1x
- Diet: Gluten-Free
Description
Learn how to make perfectly crispy and juicy Roasted Chicken Thighs with this easy one-pan recipe. Get the foolproof method for golden skin and tender meat now!
Ingredients
- 6 bone-in, skin-on chicken thighs
- 2 tablespoons olive oil or avocado oil
- 1 ½ teaspoons kosher salt
- 1 teaspoon freshly ground black pepper
- 1 teaspoon garlic powder
- ½ teaspoon smoked paprika
- Fresh herbs like thyme or rosemary sprigs
- 1 lemon, cut into wedges
Instructions
- Step: Preheat your oven to a roaring 425°F (220°C). While it heats up, take your chicken thighs and pat them completely dry with paper towels—get every bit of moisture off that skin. This is your crispy-skin secret weapon. Place them on a plate and drizzle with the olive oil, rubbing it all over both sides.
- Step: In a small bowl, mix together the kosher salt, black pepper, garlic powder, and smoked paprika if you’re using it. Sprinkle this seasoning mix generously over both sides of the chicken thighs, but really focus on getting a good, even layer on the skin side. Don’t just dust it—massage it in a little.
- Step: Now, grab your oven-safe skillet. You don’t need to add any extra oil. Place the chicken thighs in the skillet, skin-side up, making sure they aren’t crowded. A little space between them allows for better hot air circulation, which means crispier skin all around. If you have fresh herbs, tuck a few sprigs around the chicken.
- Step: Slide the skillet right into the preheated oven. The sizzle you might hear is a very good sign. Roast, undisturbed, for 30-35 minutes. You’ll know they’re done when the skin is deep golden brown and crispy, and the internal temperature registers 165°F (74°C) at the thickest part, not touching the bone. The juices should run clear.
- Step: This is a crucial step for the texture: once you pull the skillet from the oven, let the chicken rest for about 5-10 minutes before serving. This allows the frantic juices to relax and redistribute back throughout the meat, ensuring every single bite is moist and flavorful. Squeeze fresh lemon juice over the top right before serving for a bright, zesty finish.
Notes
Store leftovers in an airtight container for up to 3–4 days. Freeze in a single layer then transfer to a freezer bag for up to 3 months. Reheat in a 375°F oven or air fryer to restore crispiness; avoid the microwave.
- Prep Time: 5 minutes
- Cook Time: 35 minutes
- Category: chicken thigh recipes
- Method: Roasting
- Cuisine: American, Mediterranean
Nutrition
- Serving Size: 1 thigh
- Calories: 310 kcal
- Sugar: 0 g
- Sodium: 580 mg
- Fat: 21 g
- Saturated Fat: 5 g
- Unsaturated Fat: 14 g
- Trans Fat: 0 g
- Carbohydrates: 1 g
- Fiber: 0 g
- Protein: 28 g
- Cholesterol: 110 mg