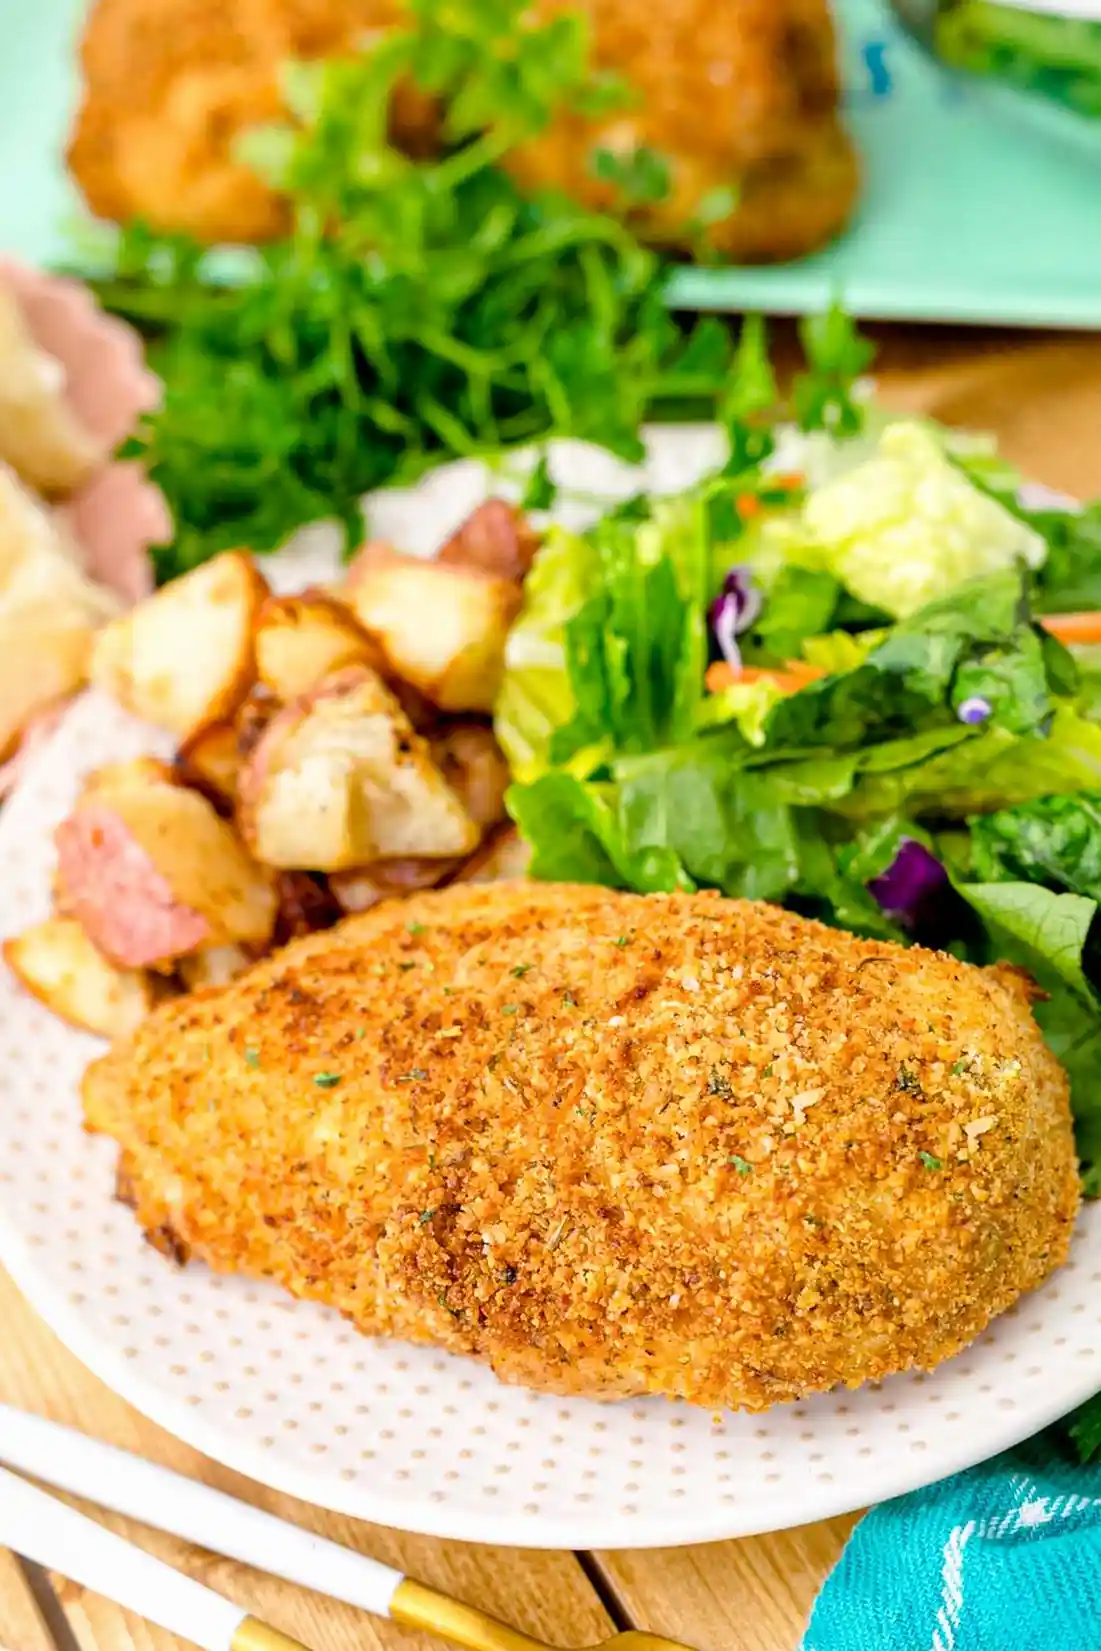
This homemade shake and bake chicken recipe is the perfect solution for busy weeknights when you want a crispy, comforting meal without any store-bought kits. By combining simple pantry spices with fresh breadcrumbs, you can achieve a professional-quality golden crust right in your own oven. It takes just fifteen minutes of active time to prepare, leaving you free to focus on side dishes or simply enjoy your evening.
List of ingredients
- 1 cup dry breadcrumbs
- 1 Tablespoon cornstarch
- 1 teaspoon garlic salt
- ½ teaspoon pepper
- ½ teaspoon onion powder
- ½ teaspoon dried parsley
- ½ teaspoon thyme
- ¼ teaspoon paprika
- 6 Tablespoons olive oil (divided)
- 1½ pounds chicken breasts (about 5 breasts)
step-by-step instructions
- Step: Preheat the oven to 400°F. Line a large-rimmed baking sheet with aluminum foil and spray with non-stick spray. Set aside.
- Step: Combine the breadcrumbs, cornstarch, garlic salt, pepper, onion powder, paprika, parsley, and thyme in a gallon-sized Ziploc bag.
- Step: Add 1 tablespoon of olive oil and mix until the whole mixture is a sandy texture. Then pour the remaining 5 tablespoons of olive oil into a shallow bowl or plate and coat each piece of chicken.
- Step: Add the chicken pieces to the bag, one at a time. And shake it around to coat the chicken well. If you want a thicker breading, coat the breaded chicken in oil again, then add it to the bag of breadcrumbs and shake.
- Step: The chicken will need to be baked for about 20 minutes or until it reaches an internal temperature is 165 degrees. If using other cuts of chicken, the baking time may vary.
- Step: Remove from the oven and transfer the chicken to a cooling rack to rest for a few minutes before serving. Using a cooling rack prevents the bottom of the chicken from getting soggy.
Improving the Coating Quality
Drying the Chicken Before Application
For the best possible adherence of your breadcrumb mixture, always pat your chicken breasts dry with paper towels before dipping them in the olive oil. Excess surface moisture can cause the breading to slide off or result in a soggy coating rather than a crisp one. A dry surface ensures the oil creates a sticky base that holds the spices tightly to the meat throughout the entire baking process.
Achieving an Extra Crunchy Crust
If you prefer a much thicker and more substantial crust on your chicken, implement a double-coating method by following the steps carefully. After the initial shake and bake, quickly dip the breaded piece back into the olive oil dish and return it to the spice-filled bag for a second coating. This technique adds significant texture and flavor intensity, making it ideal for those who enjoy a hearty crunch in every bite.
Selecting the Right Poultry Cuts
Adapting for Bone-in Poultry Varieties
While boneless chicken breasts are the standard choice for this recipe, you can successfully use bone-in thighs or drumsticks if you prefer darker meat. Keep in mind that bone-in varieties will require a significantly longer roasting time, typically ranging from 35 to 45 minutes at the same temperature. Always use a digital thermometer to confirm the internal temperature reaches 165°F near the bone to ensure safety.
Preparing Smaller Pieces for Children
If you are serving younger children or preparing this for a party, feel free to slice the chicken breasts into tenders or bite-sized nuggets before coating. Smaller pieces naturally cook much faster, often in just 12 to 15 minutes, making them a great option for a quick lunch. Adjust your baking time downwards and monitor the color of the crust to avoid over-browning the smaller portions.
Storage and Freshness Maintenance
Managing Leftover Chicken Pieces
Leftover chicken can be stored in an airtight container within the refrigerator for up to four days without losing significant quality. To maintain the crispness, it is best to use a glass or hard plastic container that prevents the breading from becoming soft or absorbing moisture from other foods in the fridge. Properly sealed, the chicken remains safe and flavorful for several subsequent quick meals.
Reviving the Texture During Reheating
Avoid using the microwave to reheat your leftovers, as this almost always results in a rubbery texture and a soft, damp breading. Instead, place your cold chicken on a baking sheet and heat it in a preheated oven at 375°F for about 8 to 10 minutes until it is hot and crispy again. You can also utilize an air fryer set to 350°F for 5 minutes to restore the original crunch of the freshly baked coating.
Common Questions Regarding the Recipe
Can I make the dry mixture in advance?
Yes, you can easily prepare the dry seasoning and breadcrumb blend weeks in advance and store it in your pantry. Simply combine all the dry ingredients, including the spices and breadcrumbs, in a jar or airtight container without adding the oil. When you are ready to prepare dinner, just portion out the needed amount and add your olive oil as directed, which keeps the mixture fresh and ready to use whenever you need it.
How do I replace garlic salt if I only have powder?
It is perfectly simple to substitute garlic salt with your own homemade blend if you find yourself out of stock. Use 3/4 teaspoon of fine table salt combined with 1/4 teaspoon of plain garlic powder to match the concentration and flavor of the original ingredient. This ratio ensures your breading maintains the exact savory balance intended by the recipe without needing a specific trip to the grocery store.
Is it necessary to wash the chicken before baking?
Current food safety recommendations strongly advise against washing raw chicken in the sink before cooking. Washing raw poultry can spread bacteria through water droplets across your kitchen counters and surfaces, increasing the risk of cross-contamination. Focus instead on patting the chicken dry with paper towels, which is both cleaner and helps you achieve a much crispier result on the final product.
Selecting Ideal Serving Pairings
Classic Vegetable Sides
This dish features a bold, savory crust that pairs exceptionally well with roasted or steamed vegetable sides. Roasted root vegetables like carrots, parsnips, or sweet potatoes provide a nice sweetness that complements the garlic and thyme in the breading. If you prefer something lighter, steamed green beans with a squeeze of lemon or roasted balsamic-glazed mushrooms offer a nice acidic brightness to balance the richness of the chicken.
Starchy Accompaniments for Comfort
If you are aiming to create a traditional, family-style comfort meal, consider serving the chicken alongside creamy mashed potatoes or buttery dinner rolls. The crunch of the shake and bake coating creates a wonderful textural contrast when served with soft, fluffy carbohydrates. For a slightly healthier starch option, consider a light quinoa salad or herb-infused wild rice, which both absorb the savory drippings from the chicken beautifully.
Ensuring Consistent Baking Results
Avoiding Soggy Bottoms
The most important trick for maintaining a crispy underside on your chicken is the use of a wire cooling rack immediately after it exits the oven. When chicken sits directly on a hot baking sheet, steam gets trapped beneath the meat, which quickly softens the breading. By lifting the chicken onto a rack, air can circulate around all sides of the piece, ensuring that the bottom stays just as crispy and flavorful as the top of the crust.
Monitoring Doneness Through Visual Cues
While an instant-read meat thermometer is the most reliable way to ensure safety, you can also look for secondary signs of doneness. When you make a small incision into the thickest part of the breast, the juices should run completely clear rather than pink or cloudy. If the juices appear red or show any signs of resistance when cutting, return the chicken to the oven for an additional two or three minutes to ensure the center is perfectly cooked through.
Print
Homemade Chicken Shake and Bake Recipe
- Total Time: 35 minutes
- Yield: 5 servings 1x
- Diet: High protein
Description
This Homemade Shake and Bake Chicken is a classic comfort food recipe that covers tender, juicy chicken with a spice-filled crunchy coating! Requires only 15 minutes of hands-on prep time, your oven does the rest!
Ingredients
- 1 cup dry breadcrumbs
- 1 Tablespoon cornstarch
- 1 teaspoon garlic salt
- ½ teaspoon pepper
- ½ teaspoon onion powder
- ½ teaspoon dried parsley
- ½ teaspoon thyme
- ¼ teaspoon paprika
- 6 Tablespoons olive oil (divided)
- 1½ pounds chicken breasts (about 5 breasts)
Instructions
- Step: Preheat the oven to 400°F. Line a large-rimmed baking sheet with aluminum foil and spray with non-stick spray. Set aside.
- Step: Combine the breadcrumbs, cornstarch, garlic salt, pepper, onion powder, paprika, parsley, and thyme in a gallon-sized Ziploc bag.
- Step: Add 1 tablespoon of olive oil and mix until the whole mixture is a sandy texture. Then pour the remaining 5 tablespoons of olive oil into a shallow bowl or plate and coat each piece of chicken.
- Step: Add the chicken pieces to the bag, one at a time. And shake it around to coat the chicken well. If you want a thicker breading, coat the breaded chicken in oil again, then add it to the bag of breadcrumbs and shake.
- Step: The chicken will need to be baked for about 20 minutes or until it reaches an internal temperature is 165 degrees. If using other cuts of chicken, the baking time may vary.
- Step: Remove from the oven and transfer the chicken to a cooling rack to rest for a few minutes before serving. Using a cooling rack prevents the bottom of the chicken from getting soggy.
Notes
You can use vegetable oil as a substitute for olive oil. To achieve a thicker breading, repeat the oil dip and coating process. Leftovers can be stored in the refrigerator for up to 4 days or frozen for 3 months.
- Prep Time: 15 minutes
- Cook Time: 20 minutes
- Category: Dinner
- Method: Baking
- Cuisine: American
Nutrition
- Serving Size: 1 breast
- Calories: 397 kcal
- Sugar: 1 g
- Sodium: 782 mg
- Fat: 21 g
- Saturated Fat: 3 g
- Unsaturated Fat: 17 g
- Trans Fat: 0 g
- Carbohydrates: 17 g
- Fiber: 1 g
- Protein: 32 g
- Cholesterol: 87 mg