These air fryer chicken thighs offer a perfect combination of crackling, crispy skin and incredibly succulent meat. By utilizing high-temperature air circulation, you can achieve restaurant-quality results in under thirty minutes without the hassle of traditional frying. This foolproof method relies on a simple, savory spice rub that caramelizes beautifully for a rich and complex flavor profile every single time.
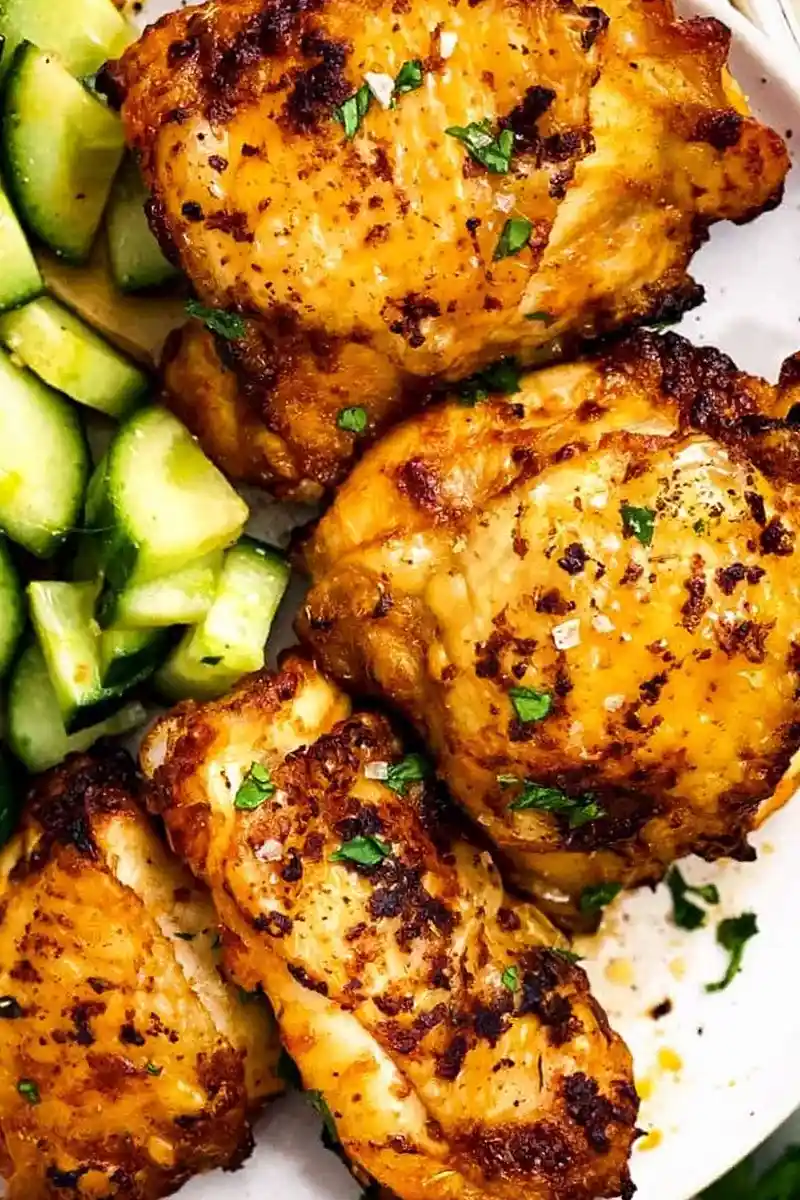
List of ingredients
- 4 bone-in, skin-on chicken thighs (about 1.5 – 2 pounds in total)
- 2 teaspoons olive oil
- 1 teaspoon ground paprika
- 1 teaspoon garlic powder
- 1 teaspoon onion powder
- 1/2 teaspoon Italian seasoning
- 1 teaspoon brown sugar
- 1 teaspoon salt (to taste)
- black pepper (to taste)
step-by-step instructions
- Step: Preheat air fryer for 5 minutes.
- Step: Pat chicken dry, then place in a bowl with the olive oil. Toss to coat.
- Step: Combine seasoning in a small bowl, then evenly sprinkle over chicken. Toss to coat. Rub seasoning into each chicken thigh to ensure it stays on.
- Step: Carefully place chicken thighs into hot air fryer basket, skin side up. Air fry at 380°F for 10 minutes, then flip and air fry at 380°F for another 8 minutes. Flip again and finish air frying at 400°F for 2 minutes. Serve immediately.
Keys to Success
The Importance of Moisture Control
Always prioritize drying the chicken skin before applying the oil and seasonings. Any liquid left on the surface creates steam, which will lead to a softer, less desirable skin texture. Use paper towels generously to achieve a bone-dry surface, as this is the primary secret to professional-level crisping in an air fryer.
Why Preheating Matters
Starting with a cold machine often results in longer cook times and uneven browning. Preheating the air fryer ensures that the hot air immediately begins to render the fat from the chicken skin the moment you place it inside. This head start allows for a much more efficient cooking process that keeps the internal meat tender while the outside turns golden and firm.
Managing Seasoning Application
When applying the rub, make sure to massage the spices firmly into the meat rather than just dusting the surface. Focus on the skin, as this is where the caramelization occurs. If you handle the chicken too gently, the seasoning may blow off into the air circulation fan of your appliance, leading to a less flavorful final dish.
Effective Substitutions
Using Alternative Oils
While olive oil provides a nice flavor, it is perfectly acceptable to use other high-smoke-point oils. Avocado oil, canola oil, or even vegetable oil work effectively in this recipe because they handle the 400°F finishing temperature without burning or imparting unpleasant flavors. Stick to neutral oils if you want the spice blend to be the primary flavor highlight.
Adjusting the Sugar Content
The brown sugar is primarily included for its caramelization properties rather than extreme sweetness. If you are following a strict low-sugar lifestyle, you can safely omit the sugar or replace it with a granulated monk fruit or erythritol sweetener. You will still achieve great browning, although the depth of flavor may be slightly less intense without the traditional sugar.
Serving Suggestions
Pairing with Starches
Because these chicken thighs are rich and savory, they pair exceptionally well with neutral, fluffy bases. Steamed jasmine rice, buttery mashed potatoes, or even a creamy mushroom risotto can soak up the rendered juices from the chicken. For a rustic feel, roasted potatoes seasoned with rosemary are a classic choice that complements the herbal notes in the chicken rub.
Choosing the Right Vegetables
Balance the richness of the dark meat with fresh or slightly charred vegetables. Sautéed green beans with garlic are a quick, nutrient-dense companion that cooks in the time it takes for your chicken to rest. Roasted broccoli or asparagus, cooked at 400°F in the oven or air fryer, adds a satisfying crunch that mirrors the texture of the crispy chicken skin.
Storage and Reheating
Proper Refrigeration Methods
Store any leftover chicken in an airtight container for up to three days in the refrigerator. Ensure the chicken has cooled completely to room temperature before closing the container to prevent condensation, which can lead to soft, soggy skin. If possible, keep the skin-side up to maintain as much structural integrity as possible.
Restoring Crispiness
Do not use the microwave to reheat this chicken, as it will ruin the texture of the skin. To restore the crispy exterior, place the cold thighs back into the air fryer at 350°F for 4 to 6 minutes. This gentle reheating process ensures the meat remains juicy while the skin regains its signature crunch without drying out the protein.
Frequently Asked Questions
Can I cook boneless chicken thighs instead?
Yes, you can substitute bone-in thighs with boneless, skinless or skin-on thighs, but you must reduce the cooking time significantly. Check the internal temperature after about 12 to 14 minutes to avoid overcooking the smaller, thinner cuts of meat. Aim for an internal temperature of 165°F to ensure they are safe and juicy.
Is it necessary to spray the air fryer basket?
You generally do not need to use non-stick spray for this recipe because chicken thighs contain a high amount of natural fat. This fat will render out during the cooking process and coat the basket, naturally preventing the meat from sticking to the grate. Only add spray if you have an older machine that is prone to sticking regardless of the ingredient content.
Why is my skin not crispy enough?
If your chicken skin remains soft, it is likely due to excess moisture on the surface before cooking or overcrowding the air fryer basket. Ensure the thighs have enough space around them to allow for proper air circulation. If the pieces are touching or stacked, the hot air cannot hit the skin, resulting in a rubbery texture rather than a crisp one.
What is the ideal temperature for the meat?
While the exterior needs high heat, the interior needs to reach 165°F to be safely cooked. Using an instant-read meat thermometer inserted into the thickest part of the thigh, away from the bone, is the most accurate way to verify doneness. Because thigh meat is more forgiving than breast meat, cooking it slightly past 165°F will still result in tender, succulent bites.
Print
Air Fryer Chicken Thighs
- Total Time: PT25M
- Yield: 4 servings 1x
- Diet: Gluten-Free
Description
These Air Fryer Chicken Thighs turn out so crispy and delicious! They are coated in the most delicious seasoning rub, then air fried until juicy on the inside with crisped up skin.
Ingredients
- 4 bone-in, skin-on chicken thighs (about 1.5 – 2 pounds in total)
- 2 teaspoons olive oil
- 1 teaspoon ground paprika
- 1 teaspoon garlic powder
- 1 teaspoon onion powder
- 1/2 teaspoon Italian seasoning
- 1 teaspoon brown sugar
- 1 teaspoon salt (to taste)
- black pepper (to taste)
Instructions
- Step: Preheat air fryer for 5 minutes.
- Step: Pat chicken dry, then place in a bowl with the olive oil. Toss to coat.
- Step: Combine seasoning in a small bowl, then evenly sprinkle over chicken. Toss to coat. Rub seasoning into each chicken thigh to ensure it stays on.
- Step: Carefully place chicken thighs into hot air fryer basket, skin side up. Air fry at 380°F for 10 minutes, then flip and air fry at 380°F for another 8 minutes. Flip again and finish air frying at 400°F for 2 minutes. Serve immediately.
Notes
Make sure to rub the seasoning well on the chicken so it stays on during cooking. No need to grease the basket; the chicken fat renders during cooking. Serve immediately for maximum crispiness.
- Prep Time: PT5M
- Cook Time: PT20M
- Category: Main Course
- Method: Air Frying
- Cuisine: American
Nutrition
- Serving Size: 1 thigh
- Calories: 340 kcal
- Sugar: 1 g
- Sodium: 694 mg
- Fat: 26 g
- Saturated Fat: 7 g
- Unsaturated Fat: 18 g
- Trans Fat: 0 g
- Carbohydrates: 2 g
- Fiber: 1 g
- Protein: 24 g
- Cholesterol: 142 mg