Achieving perfectly cooked chicken breast in an air fryer is a game-changer for busy home cooks who want consistent, restaurant-quality results without the fuss of traditional stovetop methods. By focusing on uniform thickness and proper moisture control, you can create a golden, flavorful exterior that guards a succulent, tender interior every time you cook. This reliable 30-minute process eliminates the risk of dried-out meat, making it a staple for your weekly dinner rotation.
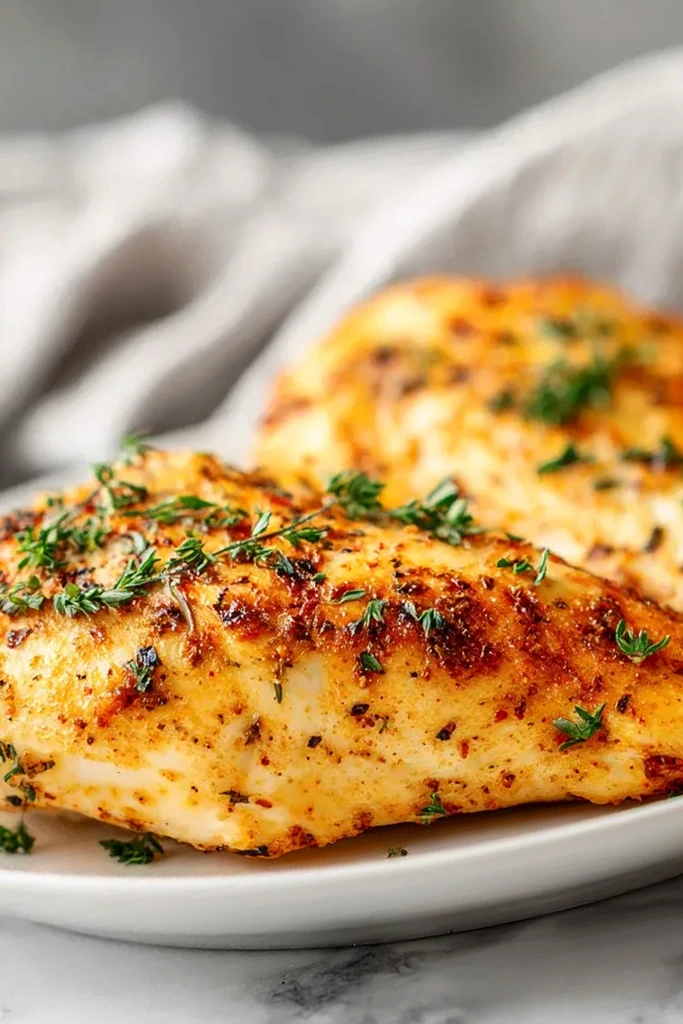
List of ingredients
- 2 large boneless skinless chicken breasts (approximately 8-10 oz each)
- 1 tsp avocado oil
- 1 tsp kosher salt
- 1/2 tsp smoked paprika
- 1/2 tsp garlic powder
- 1/2 tsp onion powder
- 1/4 tsp black pepper
- 1/8 tsp cayenne pepper
step-by-step instructions
- Step: Place the chicken between two sheets of plastic wrap. Use a meat mallet to gently pound the thickest part of the breast until it reaches an even 1-inch thickness to ensure uniform cooking.
- Step: Pat the chicken breasts completely dry with paper towels to facilitate the Maillard reaction.
- Step: Rub the chicken with avocado oil, then coat thoroughly and evenly with the combined salt, smoked paprika, garlic powder, onion powder, black pepper, and cayenne pepper.
- Step: Allow the seasoned chicken to sit for 15 minutes. This acts as a dry brine, breaking down muscle proteins to lock in moisture.
- Step: Preheat your air fryer to 375°F (190°C).
- Step: Place the chicken breasts in the air fryer basket, ensuring they do not touch or overlap.
- Step: Cook for 12 to 18 minutes, flipping halfway through, until an instant-read thermometer registers an internal temperature of 160°F (71°C).
- Step: Remove the chicken from the air fryer and let it rest for 5 minutes. Carryover cooking will bring the internal temperature to the food-safe 165°F (74°C) while retaining juices.
Practical Preparation Strategies
Why Pounding Meat Matters
Chicken breasts naturally taper from a thick end to a thin tail. If you do not pound them to an even thickness, the thin end will inevitably overcook and turn dry while the center is still reaching the required internal temperature. An even surface allows for uniform heat penetration and a consistent final texture.
The Role of Surface Moisture
Surface moisture acts as a barrier to heat, essentially steaming the meat instead of searing it. By patting the chicken completely dry with paper towels before applying your oil and seasonings, you ensure that the air fryer can immediately focus on crisping the surface. This simple step creates the golden-brown, appetizing exterior that characterizes a high-quality meal.
Maximizing Airflow Dynamics
Air fryers function by circulating superheated air at high speeds around the food. If your chicken breasts touch or overlap in the basket, the air cannot reach those contact points, causing the chicken to steam. Always give each piece enough room so that the hot air can wrap completely around the meat for an even, crispy finish.
Flavor Enhancements and Adjustments
Adjusting Spice Intensity
The provided spice blend is balanced for a savory, smoky finish, but it is easily customized. If you prefer a brighter, more herbal profile, you can swap the smoked paprika and cayenne for a tablespoon of dried Italian seasoning and a squeeze of fresh lemon juice after cooking. These adjustments change the flavor profile entirely without requiring a change in the technical cooking method.
The Benefit of Dry Brining
Allowing the seasoned chicken to sit for 15 minutes is a critical step in moisture retention. During this time, the salt draws out surface moisture and is then reabsorbed into the fibers along with the dissolved spice rub. This process not only seasons the chicken deeper than a surface-level dusting but also alters the protein structure to hold more moisture during the intense heat of the air fryer.
High Smoke Point Oil Selection
Avocado oil is recommended because it handles the 375°F temperature easily without smoking or developing a burnt flavor. If you do not have avocado oil, you can use other high-heat alternatives like refined coconut oil or light olive oil. Avoid using extra virgin olive oil if possible, as it has a lower smoke point and may impart a bitter taste at high temperatures.
Managing Leftovers and Planning
Effective Storage Practices
Cooked chicken breast keeps well in an airtight container in the refrigerator for up to 4 days. If you plan to keep it longer, wrap each breast individually in plastic wrap and store them in a heavy-duty freezer bag for up to 2 months. Individual wrapping helps prevent freezer burn and makes it easy to grab only the portion you need for a quick lunch or dinner.
Reheating Without Sacrificing Texture
Avoid the microwave for reheating, as it often results in rubbery, tough meat due to the way it agitates water molecules. The best method for reheating is to place the chicken back into the air fryer at 350°F for 3 to 5 minutes. This approach restores the crust and ensures the inside remains warm without drying out the fibers.
Utilizing Cold Leftovers
Chilled, pre-cooked chicken is excellent for salads, grain bowls, or wraps. Slicing the cold chicken thinly against the grain makes it tender and easier to integrate into other meals. You can add the cold slices to a bowl of mixed greens with your favorite vinaigrette for a refreshing, protein-packed meal that requires zero cooking time during your busy workday.
Addressing Common Cooking Hurdles
What Causes Bitter Spots on Chicken
If you notice dark, bitter spots, it usually means the spice rub scorched during the cooking process. This can happen if the air fryer is too close to the heating element or if the spice mix was applied too heavily without enough oil to protect it. Ensure the oil creates a light, uniform coating on the surface of the meat before it enters the basket.
Why Meat Might Feel Bouncy
A bouncy or tough texture in chicken breast is almost always a sign of overcooking or not allowing the meat to rest. Since chicken continues to cook after it is removed from the heat source, pulling it at 160°F is safer than aiming for 165°F while it is still inside the air fryer. The 5-minute rest period is non-negotiable for achieving a tender, non-rubbery bite.
Internal Temperature Verification
Using an instant-read thermometer is the only way to accurately track the doneness of your chicken without cutting into it. Since every air fryer model circulates air differently, your specific unit might cook slightly faster or slower than others. Relying on the thermometer rather than a fixed timer is the most accurate way to guarantee safe, juicy chicken every single time.
Frequently Asked Questions
Can I cook frozen chicken breasts in the air fryer?
It is not recommended to cook raw, frozen chicken breasts directly in the air fryer. The exterior will likely overcook or burn before the center reaches a safe temperature. Always thaw your chicken completely in the refrigerator or under cold running water before starting the seasoning and cooking process.
Why should I avoid oil sprays with propellants?
Many commercial non-stick cooking sprays contain chemicals and propellants that can gradually damage the non-stick coating of your air fryer basket. Using a small amount of high-quality oil applied with a brush or a manual pump mister is safer for your equipment and generally yields a better flavor.
Is it necessary to flip the chicken halfway?
Yes, flipping is necessary to ensure both sides of the chicken receive direct exposure to the hot air circulation. Since the air fryer heats from the top down, the bottom side needs to be turned to achieve the same golden color and texture as the top, leading to a more evenly cooked and visually appealing result.
Print
Air Fryer Chicken Breasts: Juicy and Tender
- Total Time: PT30M
- Yield: 4 servings 1x
- Diet: High Protein
Description
Master air fryer chicken breasts with our step-by-step timing guide. Get a golden crust and juicy results using simple ingredients. Ready in 30 minutes.
Ingredients
- 2 large boneless skinless chicken breasts (approximately 8–10 oz each)
- 1 tsp avocado oil
- 1 tsp kosher salt
- 1/2 tsp smoked paprika
- 1/2 tsp garlic powder
- 1/2 tsp onion powder
- 1/4 tsp black pepper
- 1/8 tsp cayenne pepper
Instructions
- Step: Place the chicken between two sheets of plastic wrap. Use a meat mallet to gently pound the thickest part of the breast until it reaches an even 1-inch thickness to ensure uniform cooking.
- Step: Pat the chicken breasts completely dry with paper towels to facilitate the Maillard reaction.
- Step: Rub the chicken with avocado oil, then coat thoroughly and evenly with the combined salt, smoked paprika, garlic powder, onion powder, black pepper, and cayenne pepper.
- Step: Allow the seasoned chicken to sit for 15 minutes. This acts as a dry brine, breaking down muscle proteins to lock in moisture.
- Step: Preheat your air fryer to 375°F (190°C).
- Step: Place the chicken breasts in the air fryer basket, ensuring they do not touch or overlap.
- Step: Cook for 12 to 18 minutes, flipping halfway through, until an instant-read thermometer registers an internal temperature of 160°F (71°C).
- Step: Remove the chicken from the air fryer and let it rest for 5 minutes. Carryover cooking will bring the internal temperature to the food-safe 165°F (74°C) while retaining juices.
Notes
Ensure the chicken is not crowded in the basket for the best golden crust. The dry brine step is crucial for moisture retention. If your chicken is thicker than 1 inch, adjust cooking time slightly.
- Prep Time: PT15M
- Cook Time: PT15M
- Category: Main Course
- Method: Air Frying
- Cuisine: American
Nutrition
- Serving Size: 1 breast
- Calories: 163 kcal
- Sugar: 0 g
- Sodium: 585 mg
- Fat: 4.5 g
- Saturated Fat: 0.8 g
- Unsaturated Fat: 3.2 g
- Trans Fat: 0 g
- Carbohydrates: 1 g
- Fiber: 0.2 g
- Protein: 29 g
- Cholesterol: 84 mg