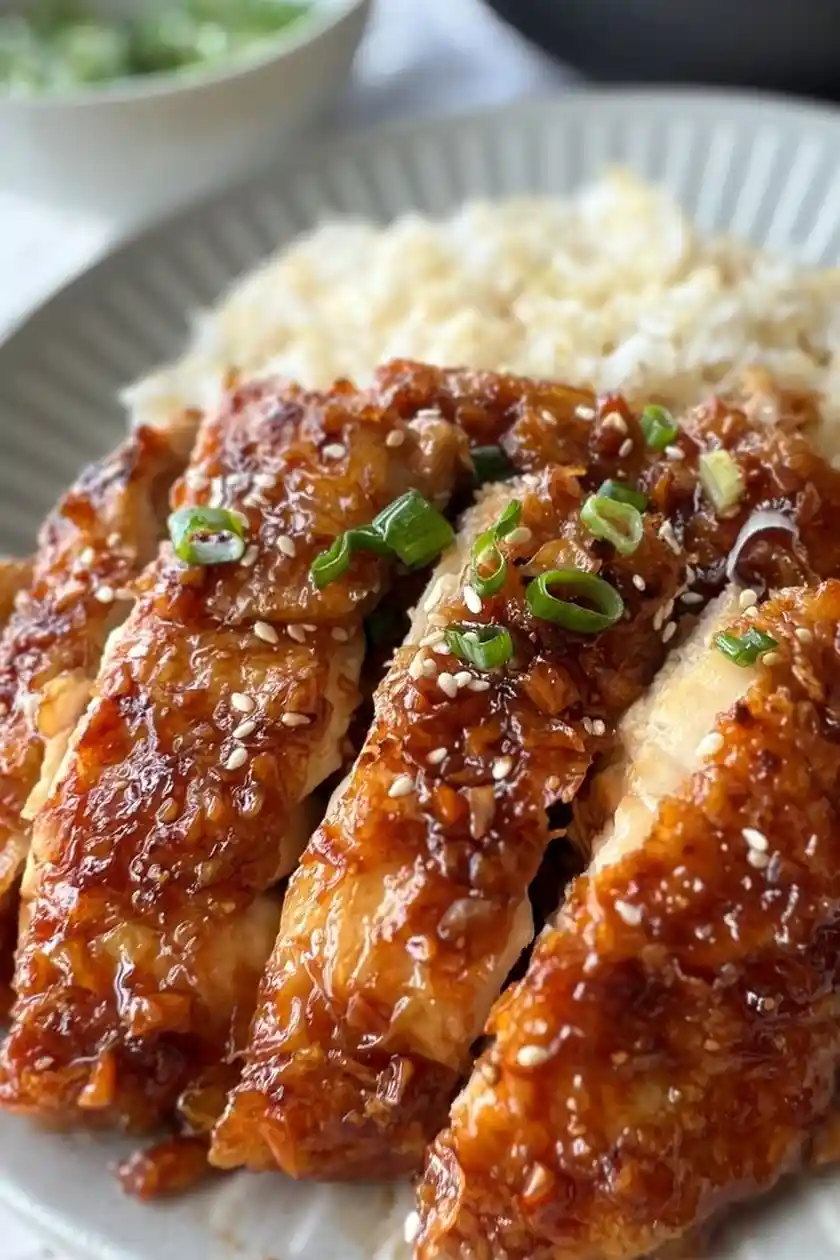
This fast-paced chicken recipe delivers a sweet and savory glaze in just 15 minutes. It is an ideal high-protein meal for busy weeknights that requires no lengthy marinating process.
List of ingredients
- 3 pieces boneless skin-on chicken thighs – ensures the meat remains juicy.
- 8-10 cloves garlic, minced – provides a strong aromatic base.
- 3.5 tbsp honey – creates the sweet, sticky glaze.
- 3 tbsp soy sauce – adds saltiness and umami flavor.
- 1/4 cup cornstarch – used for coating to achieve a crispy exterior.
- 2 tbsp cooking oil – for pan-frying the chicken.
- Black pepper, sesame seeds, and sliced scallions (optional) – for seasoning and final garnish.
step-by-step instructions
- Coat the chicken: Pour cornstarch onto a plate and dip both sides of the chicken thighs into the powder. Set them aside once fully coated.
- Prepare aromatics: Mince the garlic and slice the scallions. Set these ingredients aside for quick access during the cooking process.
- Heat the pan: Place a skillet over medium heat and pour in the cooking oil. Add the coated chicken thighs to the hot oil.
- Sear the first side: Let the chicken fry undisturbed for 2-3 minutes. Do not turn the meat until the underside is golden brown.
- Cook the second side: Flip the chicken thighs over. Keep the heat on medium and let them cook for 3 minutes without moving them.
- Rest the chicken: Transfer the cooked chicken thighs to a plate and set them aside.
- Simmer the sauce: In the same pan, add the minced garlic, soy sauce, honey, and black pepper. Stir the mixture constantly for 1 minute.
- Glaze the meat: Return the chicken thighs to the pan. Fry them for 1 minute on each side until the sauce thickens and coats the meat.
- Garnish and serve: Sprinkle the sliced scallions and sesame seeds over the top. Serve immediately.
Pro Techniques for Maximum Crispiness
Use Cornstarch for a Better Crust
Cornstarch is superior to flour for this recipe because it creates a thinner, crispier shell. It absorbs surface moisture and reacts with the oil to form a light crunch that holds onto the glaze.
Maintain Consistent Medium Heat
Avoid using high heat, which can burn the honey in the sauce before the chicken is cooked. Medium heat allows the chicken skin to render its fat and brown evenly without scorching the exterior.
Avoid Overcrowding the Skillet
Ensure there is enough space between the chicken thighs in the pan. Overcrowding lowers the pan temperature and causes the chicken to steam rather than sear, resulting in a soggy crust.
Dry the Chicken Before Coating
Pat the chicken thighs dry with paper towels before dipping them in cornstarch. Removing excess moisture prevents the cornstarch from becoming clumpy and helps the oil sear the meat faster.
Ingredient Substitutions and Variations
Replace Honey with Maple Syrup
If you prefer a woodier sweetness, substitute the honey with pure maple syrup in the same quantity. This change alters the flavor profile slightly but maintains the same sticky consistency.
Swap Soy Sauce for Tamari
For a different salt profile or a gluten-free option, use tamari instead of soy sauce. Tamari is typically richer and slightly less salty than standard soy sauce.
Use Chicken Breast Instead of Thighs
If using boneless skinless chicken breasts, cut them into equal-sized medallions first. Reduce the cooking time for each side to 2-3 minutes to prevent the lean meat from drying out.
Substitute Cornstarch with Potato Starch
Potato starch can be used as a direct 1:1 replacement for cornstarch. It produces a similarly crispy texture and works well with the honey garlic glaze.
Incorporate Fresh Ginger for Extra Zest
Adding one teaspoon of freshly grated ginger to the sauce mixture adds a sharp, spicy note. Stir the ginger in at the same time as the minced garlic for the best flavor extraction.
Optimal Pairing and Serving Suggestions
Serve Over Steamed White Rice
Plain jasmine or basmati rice is the best accompaniment for this dish. The neutral flavor of the rice absorbs the extra honey garlic sauce from the pan.
Pair with Stir-Fried Bok Choy
Quickly sautéing bok choy or baby spinach provides a fresh, bitter contrast to the sweetness of the glaze. Use a small amount of garlic and soy sauce to season the greens.
Add a Fresh Cucumber Salad
A chilled salad of sliced cucumbers, rice vinegar, and a pinch of sugar cleanses the palate. The acidity of the vinegar cuts through the richness of the chicken skin.
Use Quinoa for a Nutty Base
Cooked quinoa is a healthy alternative to rice that adds more protein and fiber. Its nutty taste complements the soy and honey flavors well.
Storage and Preservation Guide
Refrigerating Leftovers
Place the cooked chicken in an airtight container and refrigerate for up to three days. Ensure the chicken has cooled slightly before sealing the lid to prevent excess condensation.
Freezing Glazed Chicken
While the chicken can be frozen, the texture of the crust will soften. Freeze in a vacuum-sealed bag for up to two months, thawing completely in the fridge before reheating.
Selecting the Right Containers
Use glass containers for storage to avoid any flavor transfer. Glass also allows for easier transitioning to the oven or microwave during the reheating process.
Best Ways to Reheat
Using an Air Fryer for Crispiness
Place the chicken in an air fryer at 350°F (175°C) for 3-5 minutes. This is the most effective method for restoring the crunch of the cornstarch coating.
Microwave Reheating Method
Heat the chicken on medium power in 30-second intervals. While this is the fastest method, it will make the skin soft and may cause the sauce to separate.
Stovetop Reheating Tips
Warm the chicken in a skillet over low heat with a teaspoon of water or oil. Cover the pan with a lid for 2 minutes to steam the meat through without burning the glaze.
Meal Planning and Preparation
Pre-Mincing Garlic and Aromatics
Mince the garlic and slice the scallions a few hours in advance. Store them in small airtight containers in the refrigerator to save time during the 15-minute cook window.
Pre-Measuring the Sauce Ingredients
Mix the honey, soy sauce, and black pepper in a small jar before starting the chicken. This ensures the sauce is ready to pour into the pan the moment the chicken is removed.
Preparing the Coating Station
Set up your cornstarch on a wide plate and have your frying pan ready before the meat leaves the fridge. Efficient organization is key to finishing the dish in 15 minutes.
Troubleshooting Common Issues
What to do if the Sauce Burns
If the honey in the sauce begins to bubble too aggressively or turn dark brown, remove the pan from heat immediately. Add a tablespoon of water to thin the sauce and lower the temperature.
Fixing a Sauce That is Too Thin
If the glaze is too watery, let it simmer for an extra minute before returning the chicken to the pan. The honey will naturally thicken as the water evaporates.
Ensuring the Chicken is Fully Cooked
Use a meat thermometer to check that the thickest part of the thigh reaches 165°F (74°C). If the exterior is brown but the inside is raw, lower the heat and cover the pan for 2 minutes.
Preventing Cornstarch Clumps
If the cornstarch clumps on the meat, shake off the excess before placing the chicken in the oil. This prevents burnt flour spots from forming in the skillet.
Frequently Asked Questions
Can I use a different cooking oil?
Yes, any oil with a high smoke point will work, such as canola, vegetable, or grapeseed oil. Avoid extra virgin olive oil as it may smoke too much at the temperatures needed for searing.
Is the skin necessary for this recipe?
The skin is recommended for maximum flavor and crispiness. However, you can use skinless thighs; just be aware that the texture will be softer and the meat may cook slightly faster.
How do I store the extra sauce?
Store any leftover sauce in a small glass jar in the fridge for up to one week. You can reheat it gently in a saucepan or microwave to use as a dip for other proteins.
Can I add ginger to this recipe?
Yes, adding fresh grated ginger provides a traditional Chinese flavor profile. Add it to the pan at the same time as the garlic for about 30 seconds of sautéing.
Can I use a non-stick pan?
A non-stick pan works well for easy cleanup. However, a stainless steel or cast iron skillet generally produces a superior sear and better browning on the chicken skin.
What if I don’t have honey?
You can use brown sugar or maple syrup as a replacement. Brown sugar will give a deeper, molasses-like flavor, while maple syrup is lighter and more floral.
Print
15 Minute Honey Garlic Soy Chicken
- Total Time: 15 minutes
- Yield: 3 servings 1x
- Diet: General
Description
This honey garlic chicken thighs recipe takes less than 15 minutes. You don’t need a marinade and only 3 ingredients honey garlic sauce to make your dinner quick and easy. It’s crispy on the outside, juicy and tender on the inside.
Ingredients
- 3 pieces chicken thigh boneless skin-on
- 8–10 cloves garlic, minced
- 3.5 tbsp honey
- 3 tbsp soy sauce
- 1/4 cup cornstarch
- 2 tbsp cooking oil
- black pepper (optional)
- sesame seeds (optional)
- sliced scallion (optional)
Instructions
- Prepare: Prepare a plate, pour cornstarch into it, and dip the chicken thighs in the cornstarch on both sides. Set aside.
- Prep: Minced garlic and sliced scallion. Set aside.
- Heat: Heat skillet over medium heat. Pour in oil and add chicken thighs.
- Sear: Don’t turn the chicken thighs until the underside is golden brown, about 2-3 minutes.
- Cook: Turn the chicken thighs over to the other side. Turn the heat to medium. Don’t move them for 3 minutes until they’re cooked.
- Rest: Transfer the chicken thighs to a plate. Set aside.
- Sauce: In the same pan, add garlic, soy sauce, honey and black pepper, and stir for 1 minute.
- Glaze: Add chicken thighs and fry for 1 minute on both sides.
- Garnish: Sprinkle scallions and sesame seeds on top. Ready to serve.
Notes
Using chicken thighs with skin is key to achieving the crispy exterior while keeping the inside juicy.
- Prep Time: 5 minutes
- Cook Time: 10 minutes
- Category: Main Course
- Method: Pan-frying
- Cuisine: Chinese
Nutrition
- Serving Size: 1 chicken thigh
- Calories: 420 kcal
- Sugar: 18 g
- Sodium: 850 mg
- Fat: 22 g
- Saturated Fat: 6 g
- Unsaturated Fat: 16 g
- Trans Fat: 0 g
- Carbohydrates: 24 g
- Fiber: 1 g
- Protein: 32 g
- Cholesterol: 115 mg