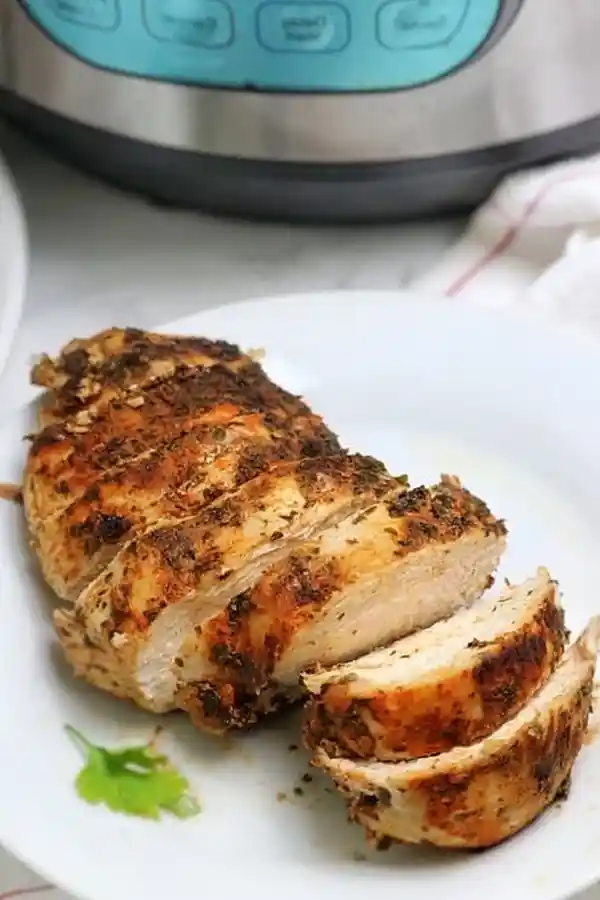
Cooking chicken breasts in a pressure cooker is the most efficient way to achieve consistently moist and tender results every single time. By utilizing steam and controlled pressure, this method locks in flavor while preventing the meat from drying out, which often happens with conventional stovetop or oven cooking methods. This guide covers everything from preparing your spice rub to managing pressure releases for the best texture possible.
List of ingredients
- 3 Chicken breast
- 1 tablespoon Smoked paprika
- 1 tablespoon Parsley
- 1/2 tablespoon Coriander
- 1 teaspoon Onion Powder
- 1/2 teaspoon Tarragon
- 1/2 teaspoon Cayenne or black pepper
- 1 chicken stock cube, crushed
- 3 tablespoon Oil (vegetable, olive or sunflower oil)
- Salt to taste
- 1 cup Chicken broth or Water
step-by-step instructions
- Step 1: Combine paprika, onion powder, parsley, tarragon, coriander, stock cube, pepper, and salt to create a dry rub.
- Step 2: Pat the chicken dry and coat thoroughly with the dry rub.
- Step 3: Set the Instant Pot to saute mode, add oil, and sear both sides of the chicken breasts until browned.
- Step 4: Remove chicken, deglaze the pot with water or broth, and insert the trivet.
- Step 5: Arrange chicken on the trivet, seal the lid, and cook on manual high pressure for 7 minutes (fresh) or 12 minutes (frozen).
- Step 6: Perform a natural pressure release for 8 minutes before opening.
- Step 7: Let the chicken rest for 5 minutes before serving.
Essential Preparation Techniques
The Importance of Surface Moisture
Always ensure your chicken breasts are completely dry before you apply the spice rub. Excess surface moisture prevents the spices from forming a cohesive barrier and can make the chicken steam rather than brown properly when it hits the hot oil in the saute stage. Use high-quality paper towels to dab both sides, as this small effort significantly impacts the final texture of the seared exterior.
Why Deglazing Is Non-Negotiable
When you brown meat in a high-heat vessel, caramelized proteins naturally stick to the bottom of the steel insert. If you do not scrape these loose with liquid before starting the pressure cycle, these proteins can scorch, which triggers the automatic safety burn alarm in modern pressure cookers. Always use a flat-edged wooden or silicone tool to clear the base of the pot entirely after adding your cooking liquid.
The Role of the Natural Pressure Release
A natural pressure release is critical when cooking lean proteins like chicken breast. By allowing the pressure to decrease on its own for eight minutes, you give the internal fibers of the meat time to relax and reabsorb moisture. If you perform a quick release immediately, the sudden drop in pressure can cause the proteins to seize up, resulting in a tougher, stringier texture that is less appealing to eat.
Refining Your Spice Profile
Adjusting Heat Levels
While this recipe utilizes cayenne pepper for a subtle background warmth, you can easily substitute it with smoked chipotle powder if you prefer a deeper, more campfire-inspired flavor. If you find the cayenne too sharp, consider blending it with a touch of smoked paprika or garlic powder to mellow the kick. Always taste a tiny pinch of your rub mix before applying it to the meat to ensure it aligns with your palate.
Fresh versus Dried Herbs
This recipe relies on dried herbs because they hold up exceptionally well to the intense heat and moisture of a pressure cooking environment. If you only have fresh herbs on hand, you would typically need to triple the amount stated in the recipe. However, note that fresh herbs can sometimes turn dark or lose their aromatic brightness during the pressure cooking process, which is why dried varieties are generally preferred for this specific technique.
Troubleshooting Common Issues
Addressing Overcooked Meat
If your chicken consistently turns out dry, ensure you are not slicing it too soon after it comes out of the machine. Resting allows the internal juices to redistribute throughout the tissue rather than spilling out onto your cutting board immediately. Check that you are using a thermometer to verify an internal temperature of 165F, which helps you identify if you need to adjust your timing by just one or two minutes in future sessions.
Managing the Burn Error
If you encounter a burn warning, verify that you have used the correct amount of liquid—specifically, ensure you are using at least one full cup for a standard six-quart unit. If you are using a larger eight-quart model, you may need to increase the liquid to 1.5 or 2 cups to account for the larger surface area of the pot. Always confirm that the silicone gasket on your lid is clean and seated properly to prevent liquid evaporation.
Practical Serving and Storage
Creating a Simple Pan Sauce
The liquid remaining in the pot after cooking is essentially a concentrated essence of chicken and spices. You can easily turn this into a thick, restaurant-quality gravy by whisking in a small slurry of cornstarch and cold water while the pot is in saute mode. Stir constantly for about two minutes until the sauce coats the back of a spoon, then serve immediately over your sliced chicken or side dishes.
Effective Cooling and Refrigeration
To safely store leftovers, allow the chicken to cool to room temperature for no longer than two hours before moving it into the refrigerator. Using an airtight glass container helps maintain the moisture content of the meat, preventing it from drying out over the next few days. If you plan to store the chicken for longer than three days, place it in a freezer-safe bag, removing as much air as possible to prevent frost buildup.
Guidelines for Frozen Storage
When freezing your cooked chicken, slice it first to allow for portion-controlled reheating later. Label your freezer bags with the date and ensure the chicken is completely cooled before sealing. It is best to use frozen leftovers within six months to ensure the best flavor quality, though the texture will remain safe to eat for longer if kept consistently at zero degrees Fahrenheit.
Frequently Asked Questions
Can I cook chicken breasts directly from a frozen state?
Yes, you can cook frozen chicken breasts by simply increasing the pressure cooking time to 12 minutes, followed by the standard 8-minute natural pressure release. Ensure the breasts are separated as much as possible before adding them to the pot so they do not form a solid block of ice, which would hinder consistent cooking.
What is the benefit of using a trivet?
The trivet elevates the chicken slightly off the bottom of the pot, allowing the liquid to circulate effectively and creating a true steaming environment. This prevents the bottom of the chicken from becoming waterlogged or soggy while the top cooks, ensuring a uniform texture across the entire piece of poultry.
Why should I use a meat thermometer?
A meat thermometer is the only way to guarantee food safety while ensuring you do not overcook the meat. Every pressure cooker and cut of meat can behave slightly differently, and internal temperature is the most accurate metric to confirm the chicken is cooked through to the required 165F without guesswork.
Can I swap the chicken broth for something else?
You can use plain water if you prefer to keep the flavor profile neutral or if you are managing sodium intake, as the stock cube and spice rub already provide significant seasoning. Vegetable broth is another excellent alternative that provides a slightly more earthy sweetness to the final drippings if you intend to make gravy.
Print
Easy Pressure Cooker Chicken Breasts
- Total Time: PT20M
- Yield: 3 Chicken Breasts 1x
- Diet: Low Carb
Description
Easy instant pot chicken breast recipe that is juicy, well seasoned and flavorful. This pressure cooker chicken breast is tender, moist, delicious, quick and easy to make using fresh or frozen chicken breast.
Ingredients
- 3 Chicken breast
- 1 tablespoon Smoked paprika
- 1 tablespoon Parsley
- 1/2 tablespoon Coriander
- 1 teaspoon Onion Powder
- 1/2 teaspoon Tarragon
- 1/2 teaspoon Cayenne or black pepper
- 1 chicken stock cube, crushed
- 3 tablespoon Oil (vegetable, olive or sunflower oil)
- Salt to taste
- 1 cup Chicken broth or Water
Instructions
- Step 1: Combine paprika, onion powder, parsley, tarragon, coriander, stock cube, pepper, and salt to create a dry rub.
- Step 2: Pat the chicken dry and coat thoroughly with the dry rub.
- Step 3: Set the Instant Pot to saute mode, add oil, and sear both sides of the chicken breasts until browned.
- Step 4: Remove chicken, deglaze the pot with water or broth, and insert the trivet.
- Step 5: Arrange chicken on the trivet, seal the lid, and cook on manual high pressure for 7 minutes (fresh) or 12 minutes (frozen).
- Step 6: Perform a natural pressure release for 8 minutes before opening.
- Step 7: Let the chicken rest for 5 minutes before serving.
Notes
Always deglaze the pot after searing to prevent the burn error. Internal temperature should reach at least 165F (75C). Use 1.5 – 2 cups of liquid if using an 8qt Instant Pot.
- Prep Time: PT5M
- Cook Time: PT7M
- Category: Chicken
- Method: Pressure Cooker
- Cuisine: American
Nutrition
- Serving Size: 1 Chicken Breast
- Calories: 396 kcal
- Sugar: 1 g
- Sodium: 584 mg
- Fat: 20 g
- Saturated Fat: 2 g
- Unsaturated Fat: 18 g
- Trans Fat: 0 g
- Carbohydrates: 2 g
- Fiber: 1 g
- Protein: 49 g
- Cholesterol: 145 mg