Achieving perfectly roasted chicken at home is straightforward when you rely on high-quality spices and controlled oven temperatures. This method ensures that each piece remains succulent on the inside while developing a flavorful, golden-brown crust on the outside. It is an excellent choice for a reliable weeknight dinner that pairs beautifully with various side dishes.

List of ingredients
- 3 to 4 pounds whole chicken, cut into pieces
- Olive oil or cooking spray
- ½ teaspoon salt
- ½ teaspoon freshly ground black pepper
- ½ teaspoon smoked paprika
- ½ teaspoon garlic powder
- ½ teaspoon onion powder
- ½ teaspoon dried thyme
- ½ teaspoon dried oregano
- chopped fresh parsley (for garnish)
step-by-step instructions
- Step: Preheat oven to 400˚F.
- Step: Take chicken out of the fridge 20 minutes before you’re ready to cook.
- Step: Lightly grease a baking sheet or a baking dish with cooking spray and set aside.
- Step: Pat dry the chicken pieces with paper towels.
- Step: Grease chicken pieces with cooking spray or a drizzle of olive oil.
- Step: In a small mixing bowl combine salt, pepper, paprika, garlic powder, onion powder, thyme, and oregano; mix to combine.
- Step: Sprinkle chicken pieces with the prepared seasoning; rub it all around.
- Step: Transfer chicken to previously prepared baking dish, and arrange them chicken skin-side up. Leave a little bit of space in between the chicken pieces.
- Step: Bake, uncovered, for 30 minutes.
- Step: Lower temperature to 350˚F, and continue to cook for 10 to 20 more minutes, or until internal temperature of the chicken registers at 165˚F.
- Step: If you’d like a crispier browned skin, place chicken under the broiler the last 3 to 5 minutes.
- Step: Remove from oven.
- Step: Transfer chicken pieces to a serving plate.
- Step: Tent a piece of foil over the chicken and let rest for 8 to 10 minutes before cutting.
- Step: Garnish with parsley and serve.
Essential Roasting Techniques
Managing Oven Temperature for Texture
Starting the chicken at a higher temperature helps to render the fat under the skin quickly, which creates that desirable golden crunch. Transitioning to a lower temperature mid-way through prevents the outer layers from becoming overly charred while the internal heat slowly penetrates to the bone. This two-stage approach is the secret to professional-quality results in a home oven.
Importance of Patting the Chicken Dry
Moisture is the enemy of crispy skin in the oven. Even if you use oil or butter, any water remaining on the surface of the chicken will create steam as it heats up, which prevents the skin from crisping effectively. Taking an extra moment to blot the skin with fresh paper towels makes a significant difference in the final texture of the dish.
Utilizing a Meat Thermometer
Visual cues such as skin color can be misleading, especially with different types of ovens. An instant-read meat thermometer is the only truly accurate way to ensure your chicken is safe and perfectly cooked. Always aim for an internal temperature of 165˚F at the deepest part of the breast or thigh, ensuring you do not touch the bone with the probe, as the bone retains heat differently.
Flavor Enhancements and Variations
Alternative Herb Combinations
While the classic blend provided is excellent, you can easily adapt the flavor profile to match your specific meal. Try adding dried rosemary for a piney, intense aroma, or incorporate a pinch of crushed red pepper flakes if you enjoy a subtle heat. You can also mix in ground cumin if you prefer a slightly more earthy, Mediterranean-inspired flavor profile that pairs well with roasted vegetables.
Enhancing the Skin with Citrus
For an added brightness, you can rub a little lemon zest directly onto the chicken skin before applying the dry seasoning blend. The citrus oils work in harmony with the smoked paprika to create a complex, vibrant taste. Avoid using actual lemon juice on the skin, as the extra moisture can counteract the crisping process during the initial high-heat roasting phase.
Serving and Accompaniment Suggestions
Pairing with Hearty Starches
This style of chicken is naturally lean, making it a perfect partner for starchy side dishes that can absorb the pan juices. Mashed potatoes, roasted root vegetables, or even a simple herb-infused couscous provide a great contrast to the savory, crispy chicken. Consider preparing a simple gravy using the pan drippings to drizzle over both the chicken and your chosen starch for a cohesive, comforting meal.
Choosing Complementary Vegetables
To keep the meal balanced, opt for vegetables that can handle high heat or steam alongside the chicken. Roasted asparagus with a touch of lemon, balsamic-glazed carrots, or sautéed kale are excellent options. The goal is to choose sides that offer either a crunchy texture or a soft, creamy consistency to elevate the overall experience of the dinner.
Troubleshooting Common Roasting Issues
Handling Over-Browned Skin
If your chicken is browning too quickly before the center reaches the required temperature, loosely tent a piece of foil over the top of the dish. This prevents the heat from directly hitting the skin while still allowing the meat to continue cooking through. Only leave the foil on for the remaining duration of the cook time to avoid softening the skin too much.
Managing Excess Fat in the Pan
Whole chicken pieces often release a significant amount of rendered fat during the roasting process. If you notice a large pool of fat accumulating in the baking dish, you can carefully use a bulb baster or a large spoon to remove the excess halfway through cooking. Be extremely careful when handling the hot dish and ensure your oven mitts are secure to avoid any burns.
Storing and Reheating Best Practices
Maximizing Freshness in Storage
Proper storage is key to maintaining the texture of leftover roasted chicken. Once the meat has cooled completely, remove it from the bones if you plan to use it for secondary meals, or store it in airtight containers. If you prefer to keep the pieces intact, ensure they are stored in a shallow container so they do not sit in their own moisture, which can make the skin soggy.
Restoring Texture During Reheating
To reheat chicken without drying it out, place it in a preheated oven at 350˚F for about 10 to 15 minutes. Covering the dish with foil for the first few minutes helps the meat warm through without losing moisture, while removing the foil for the final few minutes will help reclaim some of the skin’s original crispness. Avoid the microwave if possible, as it tends to make the meat rubbery and the skin lose all its structure.
Frequently Asked Questions
Why does the chicken skin stay soft?
Soft skin is usually caused by excess moisture on the surface of the chicken or overcrowding in the roasting pan. Ensure you pat the chicken very dry before seasoning, and leave at least an inch of space between each piece to allow hot air to circulate properly.
Can I prepare this recipe ahead of time?
You can prepare the seasoning rub in advance and keep it in an airtight container for weeks. For the chicken itself, you can season it up to two hours before cooking, but keep it in the refrigerator until the final 20 minutes before it enters the oven to maintain food safety and quality.
Is it necessary to remove the skin?
Removing the skin is a personal preference. Keeping the skin on during the roasting process is highly recommended, as it acts as a protective barrier that keeps the meat underneath tender and juicy. You can easily remove the skin after the chicken has finished cooking if you prefer to consume less fat.
Print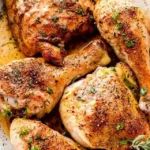
Classic Oven-Baked Chicken
- Total Time: PT70M
- Yield: 4 servings 1x
- Diet: Gluten-Free
Description
Simple, easy, and full of flavor, these classic baked chicken pieces are coated in a smoky seasoning blend and roasted up tender and juicy!
Ingredients
- 3 to 4 pounds whole chicken, cut into pieces
- Olive oil or cooking spray
- ½ teaspoon salt
- ½ teaspoon freshly ground black pepper
- ½ teaspoon smoked paprika
- ½ teaspoon garlic powder
- ½ teaspoon onion powder
- ½ teaspoon dried thyme
- ½ teaspoon dried oregano
- chopped fresh parsley (for garnish)
Instructions
- Step: Preheat oven to 400˚F.
- Step: Take chicken out of the fridge 20 minutes before you’re ready to cook.
- Step: Lightly grease a baking sheet or a baking dish with cooking spray and set aside.
- Step: Pat dry the chicken pieces with paper towels.
- Step: Grease chicken pieces with cooking spray or a drizzle of olive oil.
- Step: In a small mixing bowl combine salt, pepper, paprika, garlic powder, onion powder, thyme, and oregano; mix to combine.
- Step: Sprinkle chicken pieces with the prepared seasoning; rub it all around.
- Step: Transfer chicken to previously prepared baking dish, and arrange them chicken skin-side up. Leave a little bit of space in between the chicken pieces.
- Step: Bake, uncovered, for 30 minutes.
- Step: Lower temperature to 350˚F, and continue to cook for 10 to 20 more minutes, or until internal temperature of the chicken registers at 165˚F.
- Step: If you’d like a crispier browned skin, place chicken under the broiler the last 3 to 5 minutes.
- Step: Remove from oven.
- Step: Transfer chicken pieces to a serving plate.
- Step: Tent a piece of foil over the chicken and let rest for 8 to 10 minutes before cutting.
- Step: Garnish with parsley and serve.
Notes
Ensure chicken reaches an internal temperature of 165°F using a meat thermometer. Store leftovers in an airtight container in the refrigerator for up to 4 days.
- Prep Time: PT30M
- Cook Time: PT40M
- Category: Dinner
- Method: Baking
- Cuisine: American
Nutrition
- Serving Size: 1 piece
- Calories: 414 kcal
- Sugar: 1 g
- Sodium: 425 mg
- Fat: 29 g
- Saturated Fat: 8 g
- Unsaturated Fat: 20 g
- Trans Fat: 0 g
- Carbohydrates: 1 g
- Fiber: 1 g
- Protein: 36 g
- Cholesterol: 143 mg