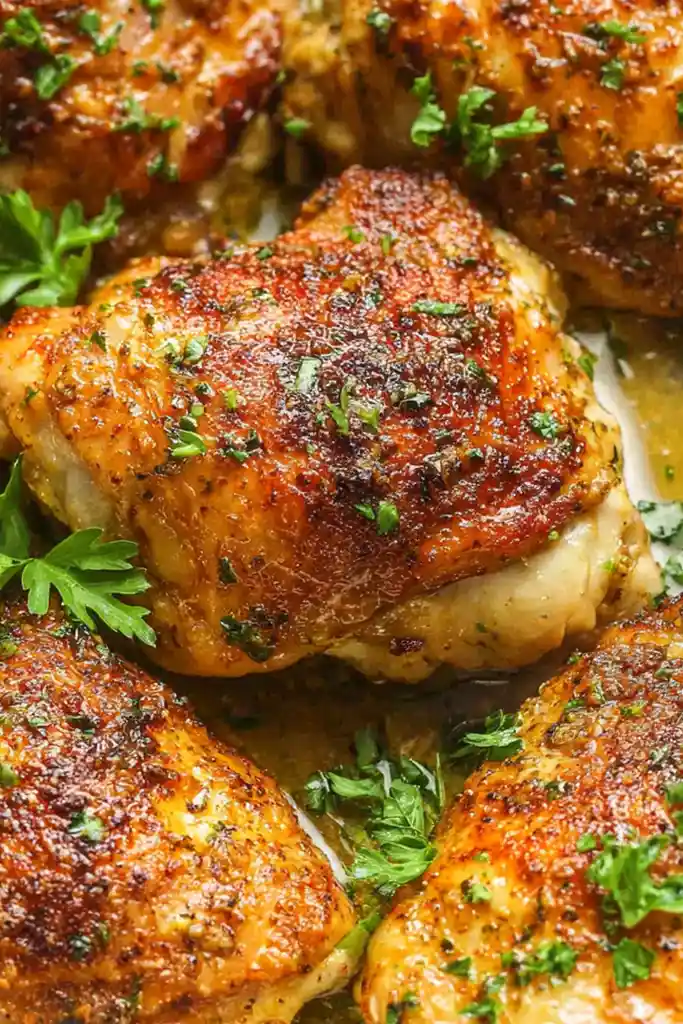
Preparing succulent chicken thighs in your pressure cooker is a time-saving method that guarantees consistent results every single time. This recipe utilizes the sear-and-steam approach to develop deep flavors, ensuring the skin maintains character while the meat remains incredibly moist. It is a reliable staple for busy weeknights when you need a high-protein meal without constant stovetop monitoring.
List of ingredients
- 2 pounds chicken thighs, bone-in and skin-on (6–8 pieces)
- ½ tsp paprika
- ½ tsp dried oregano
- ½ tsp garlic powder
- 1 tsp salt
- ¼ tsp ground black pepper
- 1 Tbsp butter
- 1 Tbsp olive oil
- 1 cup chicken stock or broth
- 1 Tbsp cornstarch mixed with 1 Tbsp water (optional)
- Chopped parsley for garnish
step-by-step instructions
- Season the Chicken: Pat chicken thighs dry and season with paprika, oregano, garlic powder, salt, and black pepper.
- Brown the Chicken: Press SAUTE on the Instant Pot and add olive oil and butter. Brown chicken skin-side down for 2–3 minutes, then flip and brown the other side for 2 minutes. Remove and set aside.
- Deglaze the Pot: Add chicken stock to the pot and scrape any browned bits from the bottom.
- Pressure Cook: Insert the trivet and place the chicken thighs on top. Secure the lid, set vent to SEALING, and cook on HIGH PRESSURE for 10 minutes.
- Optional Gravy: Set Instant Pot to SAUTE mode, add cornstarch slurry, and whisk until thickened.
- Serve: Transfer chicken to a serving plate, pour sauce over, and garnish with chopped parsley.
Refining Your Technique
Achieving Superior Browning Results
For the most appealing golden-brown crust, ensure your chicken thighs are completely dry before seasoning. Any residual moisture will create steam instead of a crisp sear, preventing the skin from developing the desired texture. Browning in smaller batches prevents the pot from becoming overcrowded, which maintains higher heat levels and ensures each piece cooks evenly.
Mastering Pressure Release Cycles
Allowing a natural release for at least five minutes after the timer beeps keeps the muscle fibers relaxed and prevents the chicken from toughening. If you are pressed for time, you can perform a quick release, but note that the meat may be slightly less tender compared to the slower cooling method. Always ensure the internal temperature of the thickest part of the thigh reaches 165°F for food safety standards.
Selecting the Best Broth
The quality of your liquid base significantly impacts the final taste of your gravy. Using a high-quality, low-sodium chicken broth allows you to control the salt content precisely. If you find the flavor too intense, swapping a portion of the stock for water can mellow the intensity without sacrificing the dish’s overall moisture.
Substitutions and Adjustments
Swapping Proteins Effectively
If you prefer using boneless, skinless thighs, reduce the initial pressure cooking time to 7-8 minutes to avoid overcooking. Drumsticks are another excellent option, though they may require a similar cook time to bone-in thighs due to their density. Chicken breasts can be substituted, but they dry out faster, so reduce the pressure cooking time to 6-8 minutes and perform a quick release immediately once the time is up.
Customizing Your Herb Profile
While the combination of paprika and oregano provides a classic profile, you can easily adapt the flavor by incorporating other dried herbs. Dried thyme adds a slightly lemony, woody aroma that works well with chicken, while a hint of rosemary brings a piney, robust quality. For a deeper, slightly sweet smokiness, try swapping half of the standard paprika for a high-quality smoked variety.
Thickening Methods for Richer Sauces
If you prefer not to use cornstarch, you can reduce the liquid by boiling it down on the SAUTE setting for a longer duration until it reaches your desired consistency. Alternatively, a roux made of equal parts butter and flour can be whisked into the hot liquid for a more traditional, opaque gravy texture. Be sure to whisk thoroughly to eliminate any lumps and achieve a glossy finish.
Creative Serving Suggestions
Balancing the Plate
The richness of the pan gravy pairs beautifully with simple, starch-based sides. Creamy mashed potatoes, buttered egg noodles, or fluffy white rice act as excellent vehicles for soaking up the excess sauce. These neutral foundations allow the seasoned, savory chicken to remain the central focus of your meal.
Adding Brightness with Fresh Vegetables
Contrast the deep, savory flavors of the chicken with light, vibrant vegetable sides. Steamed green beans tossed with lemon juice or a crisp, raw salad with a vinaigrette dressing provides necessary acidity and crunch. You could even sauté sliced zucchini or asparagus alongside the chicken if your pot has enough space, or roast them in a separate oven while the pressure cooker does the work.
Transforming Leftovers for Future Meals
The flavor of this chicken only improves after a day in the refrigerator, making it perfect for meal prep. Shred the leftover meat and incorporate it into wraps, sandwiches, or salads for a quick lunch the next day. The thickened sauce acts as a great base to keep the meat moist even after reheating, ensuring that your second-day meal is just as enjoyable as the first.
Common Queries Addressed
Can I cook chicken directly from frozen?
Yes, you can adapt this method for frozen thighs by increasing the pressure cooking time by approximately 5 to 7 minutes. It is important to ensure the chicken is not frozen together in a single block, as this leads to uneven cooking. Always confirm with a meat thermometer that the thickest part of the chicken has reached a safe temperature of 165°F before consuming.
Is this dish suitable for those monitoring carbohydrate intake?
This recipe is naturally low in carbohydrates, making it an excellent choice for a variety of lifestyle goals. By omitting the optional cornstarch for thickening, you further reduce the carbohydrate count without significantly impacting the overall flavor. The protein content remains high, providing a satiating meal that fits easily into most nutrition plans.
How do I safely store and reheat the chicken?
Store any remaining chicken and sauce in an airtight glass or plastic container in the refrigerator for up to four days. To maintain the best texture when reheating, use a microwave at a moderate power setting or gently heat in a covered pan over low heat with a splash of water or broth. Avoid prolonged, high-heat reheating, which can cause the meat to dry out or the skin to lose its structural integrity.
Why did my chicken skin turn rubbery?
A rubbery texture on the skin is typical when cooking poultry in a pressure cooker because the environment is very humid. To mitigate this, ensure you do not skip the initial browning step, as this provides a better starting point for the texture. If crispy skin is a priority, you can place the cooked chicken under a broiler for 2-3 minutes after removing it from the pressure cooker to finish the skin.
How can I adjust the intensity of the sauce?
If you prefer a milder gravy, increase the ratio of stock to spices during the initial preparation or add a splash of heavy cream at the end of the thickening process for a creamier sauce. Conversely, if you prefer a more concentrated flavor, allow the liquid to reduce by an extra minute or two while on the SAUTE setting. Taste the sauce frequently while thickening, as the reduction process can significantly concentrate the saltiness as the volume decreases.
Print
Instant Pot Chicken Thighs
- Total Time: 35 minutes
- Yield: 4 servings 1x
- Diet: Keto-friendly
Description
Juicy, flavor-packed chicken thighs prepared in the Instant Pot with a savory blend of herbs and spices. Perfect for a quick and satisfying weeknight dinner.
Ingredients
- 2 pounds chicken thighs, bone-in and skin-on (6–8 pieces)
- ½ tsp paprika
- ½ tsp dried oregano
- ½ tsp garlic powder
- 1 tsp salt
- ¼ tsp ground black pepper
- 1 Tbsp butter
- 1 Tbsp olive oil
- 1 cup chicken stock or broth
- 1 Tbsp cornstarch mixed with 1 Tbsp water (optional)
- Chopped parsley for garnish
Instructions
- Season the Chicken: Pat chicken thighs dry and season with paprika, oregano, garlic powder, salt, and black pepper.
- Brown the Chicken: Press SAUTE on the Instant Pot and add olive oil and butter. Brown chicken skin-side down for 2–3 minutes, then flip and brown the other side for 2 minutes. Remove and set aside.
- Deglaze the Pot: Add chicken stock to the pot and scrape any browned bits from the bottom.
- Pressure Cook: Insert the trivet and place the chicken thighs on top. Secure the lid, set vent to SEALING, and cook on HIGH PRESSURE for 10 minutes.
- Optional Gravy: Set Instant Pot to SAUTE mode, add cornstarch slurry, and whisk until thickened.
- Serve: Transfer chicken to a serving plate, pour sauce over, and garnish with chopped parsley.
Notes
Patting the chicken dry is essential for better browning. Natural pressure release results in the most tender chicken. You can substitute water with vegetable broth for a different flavor profile.
- Prep Time: 10 minutes
- Cook Time: 25 minutes
- Category: Main Course
- Method: Pressure Cooking
- Cuisine: American
Nutrition
- Serving Size: 1 thigh
- Calories: 380 kcal
- Sugar: 0.5 g
- Sodium: 650 mg
- Fat: 28 g
- Saturated Fat: 8 g
- Unsaturated Fat: 18 g
- Trans Fat: 0 g
- Carbohydrates: 2 g
- Fiber: 0.5 g
- Protein: 32 g
- Cholesterol: 140 mg