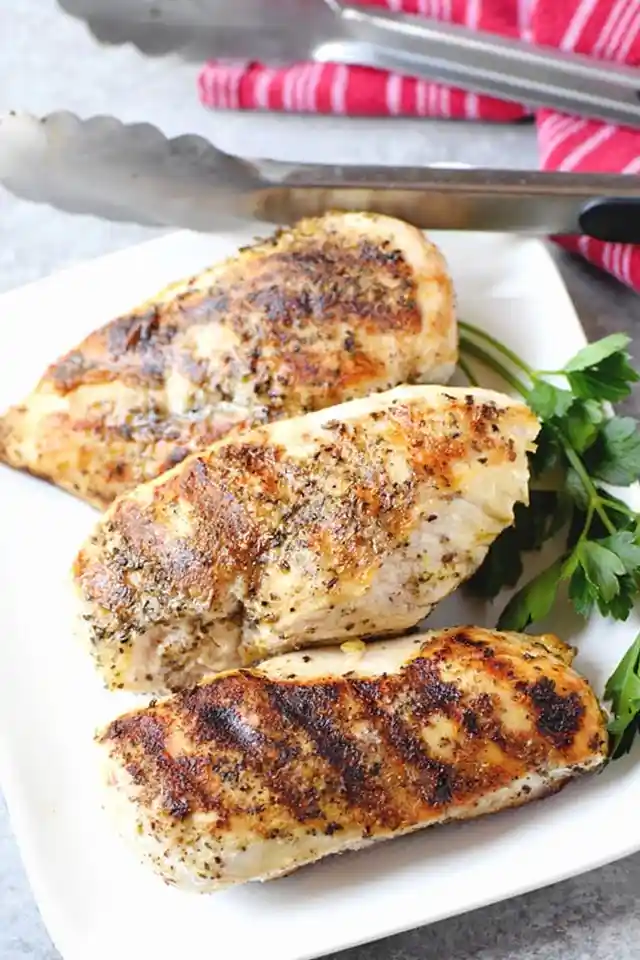
Prepare juicy, charred chicken breasts using a combination of a stovetop grill pan and the oven. This technique ensures a professional sear while maintaining a moist interior.
List of ingredients
- 3 raw boneless skinless chicken breasts (approximately 7.5 ounces each) – ensure they are of similar size for even cooking.
- Salt and pepper, to taste – use liberally to enhance the natural flavor of the meat.
- Dried oregano (about 1/8 teaspoon per chicken breast) – provides a classic earthy, herbal aroma.
- Dried basil (about 1/8 teaspoon per chicken breast) – adds a subtle sweetness and depth.
- Granulated garlic (about 1/4 teaspoon per chicken breast) – offers a concentrated savory flavor.
- Cooking spray or high smoke point oil (such as avocado, coconut, or canola oil) – essential for preventing sticking and avoiding burnt residue.
step-by-step instructions
- Preheat Oven: Set your oven to 350 degrees F to prepare for the final cooking stage.
- Season Chicken: Evenly apply the salt, pepper, dried oregano, dried basil, and granulated garlic to both sides of each chicken breast.
- Heat the Pan: Spray an indoor grill pan with cooking spray and preheat it on the stovetop over medium-high heat for approximately one minute.
- Initial Sear: Carefully place the seasoned chicken breasts onto the hot grill pan.
- First Side: Cook the chicken on the first side for about 4 minutes to develop grill marks.
- Flip and Sear: Turn the breasts over and cook the second side for about 2 minutes.
- Oven Finish: Transfer the grill pan directly into the preheated oven. If the pan is not oven-safe or does not fit, transfer the chicken to a baking dish.
- Bake: Cook in the oven for about 20 minutes, or until the internal temperature reaches the safe cooked threshold.
- Rest Meat: Remove the chicken from the heat and let it rest for 5 minutes to allow juices to redistribute.
- Store: Place any leftovers in an airtight container and store them in the refrigerator.
Mastering the Grill Pan Technique
Use a Cast Iron Skillet as an Alternative
If you do not own a dedicated grill pan, a cast iron skillet is an excellent substitute. While you will not achieve the distinct charred lines, the heavy base provides superior heat retention. This helps in creating a consistent crust on the meat before it enters the oven.
Choose High Smoke Point Oils
Using oils with a high smoke point, like avocado or coconut oil, is critical for stovetop grilling. Lower smoke point oils, such as extra virgin olive oil, can burn and create a bitter taste at medium-high temperatures. High smoke point oils remain stable and prevent the chicken from sticking to the ridges.
Avoid Overcrowding the Pan
Ensure there is enough space between each chicken breast to allow steam to escape. Overcrowding the pan lowers the surface temperature and can cause the chicken to steam rather than sear. This prevents the formation of a golden-brown crust and distinctive grill marks.
Verify Pan Temperature Before Adding Meat
The pan should be hot enough that a drop of water sizzles and evaporates immediately upon contact. Placing meat in a cold pan leads to sticking and a lack of searing. Waiting the full minute of preheating ensures the metal has reached the necessary temperature for the Maillard reaction.
Flavor Customizations and Substitutions
Incorporate Fresh Herbs
You can replace dried oregano and basil with freshly chopped versions for a brighter, more aromatic flavor. Since fresh herbs have more moisture, they may burn faster; consider adding them during the last few minutes of oven cooking. Use roughly three times the amount of fresh herbs compared to dried.
Add Cumin for Tex-Mex Style
Adding a pinch of ground cumin to the seasoning mix transforms the flavor profile into a Tex-Mex style. This pairs exceptionally well with lime juice squeezed over the chicken after it rests. It provides a smoky depth that complements the grilled exterior.
Use Rosemary and Thyme Pairings
For a more woodland or French-inspired taste, swap the basil and oregano for dried rosemary and thyme. These herbs are more pungent and pair well with an increased amount of black pepper. They are particularly effective if you are serving the chicken with root vegetables.
Swap Granulated Garlic for Fresh Garlic
Freshly minced garlic provides a sharper, more pungent flavor than granulated garlic. To prevent the fresh garlic from burning during the initial stovetop sear, mix it into a paste with the oil first. Apply this paste to the chicken just before it hits the pan.
Experiment with Paprika for Color
Adding a half-teaspoon of smoked paprika to the rub enhances the reddish-brown color of the finished breast. Smoked paprika also adds a subtle campfire flavor that mimics an outdoor grill. This is a great way to add visual appeal to a simple protein.
Serving Suggestions and Meal Pairing
Serve with Roasted Root Vegetables
Roasted carrots, parsnips, and sweet potatoes provide a sweet contrast to the savory garlic and herbs. These can be roasted in the oven at the same temperature as the chicken. Serve them on the side for a complete and nutritionally balanced meal.
Use in Greek-Style Pasta
Slice the cooked chicken breasts and toss them into a pasta dish with feta cheese, olives, and cherry tomatoes. The oregano and basil seasoning on the chicken integrates perfectly with these Mediterranean ingredients. This turns a simple protein into a hearty main course.
Top a Fresh Garden Salad
Cold or warm sliced grilled chicken is an excellent addition to a bed of mixed greens, cucumbers, and radishes. Use a light lemon-vinaigrette to complement the herbal seasoning. This is an ideal option for a healthy, high-protein lunch.
Incorporate into Chicken Casseroles
Cube the leftovers and fold them into a creamy casserole with rice or noodles. Since the chicken is already cooked and seasoned, it adds depth to the dish without requiring additional prep. This is an efficient way to use up meal-prepped portions.
Pair with Quinoa and Steamed Broccoli
For a low-carb or gluten-free option, serve the chicken alongside fluffy quinoa and steamed broccoli. The neutral flavor of the quinoa allows the garlic and herb seasoning of the chicken to stand out. A drizzle of lemon juice over the broccoli adds a bright finish.
Storage and Reheating Guidelines
Refrigerate in Airtight Containers
Store leftovers in a BPA-free airtight container to prevent the meat from drying out. Properly sealed chicken will remain fresh and safe to eat for three to four days. Keeping it separate from other foods prevents flavor transfer in the fridge.
Reheat Gently in the Oven
To maintain the texture, reheat chicken slices in the oven at 300 degrees F until warmed through. Adding a tablespoon of water or broth to the pan and covering it with foil helps steam the meat. This prevents the chicken from becoming rubbery or dry.
Microwave for Quick Warming
If using a microwave, slice the chicken thinly and cover it with a damp paper towel. Heat on medium power in 30-second intervals to avoid overcooking the center. This method is fastest but can dry out the meat if overdone.
Avoid Repeated Reheating
Only reheat the portion of chicken you intend to eat immediately. Repeatedly heating and cooling the meat breaks down the protein fibers and degrades the flavor. This often results in a tough, dry texture that is less appealing.
Advanced Meal Prep Advice
Prepare Seasonings in Bulk
Mix the dried oregano, basil, and granulated garlic in a large batch and store them in a spice jar. This allows you to quickly season multiple chicken breasts without measuring each time. It streamlines the prep process for those cooking for a large family.
Slice Chicken for Easier Storage
Once the chicken has rested and cooled, slice it into strips before refrigerating. Sliced chicken takes up less space in containers and reheats more evenly than whole breasts. It also makes assembling salads or wraps much faster during the week.
Freeze for Long Term Use
Grilled chicken can be frozen for up to three months if wrapped tightly in plastic wrap and foil. Thaw the meat in the refrigerator overnight before reheating. This is an excellent strategy for maintaining a stock of lean protein.
Marinate for Extra Moisture
While this recipe uses a dry rub, you can incorporate the same spices into an oil-based marinade. Let the chicken sit in the mixture for two hours before grilling. This helps the flavors penetrate deeper into the meat and adds an extra layer of moisture.
Common Cooking Troubleshooting
Prevent Chicken from Sticking
Sticking usually occurs if the pan is not hot enough or if the meat is too wet. Pat the chicken breasts dry with a paper towel before applying seasonings. Ensure the oil is shimmering before placing the meat in the pan.
Fix Overcooked Dry Breast
If the chicken becomes too dry, slice it thinly and toss it in a light sauce or a squeeze of lemon and olive oil. This adds moisture back to the protein fibers. Avoid overcooking by using a meat thermometer to check for an internal temperature of 165 degrees F.
Ensure Even Internal Temperature
Use chicken breasts of similar thickness to avoid one piece being raw while another is overdone. If one breast is significantly thicker, you can lightly pound it with a meat mallet to flatten it. This ensures the heat penetrates the center at the same rate as the edges.
Handle Pan Transfer Carefully
When moving the grill pan from the stove to the oven, always use heavy-duty oven mitts. Grill pans hold a significant amount of heat and can cause severe burns. If your pan is not oven-safe, transfer the meat to a preheated baking sheet immediately.
Frequently Asked Questions
Can I use frozen chicken breasts?
No, you should always fully thaw frozen chicken breasts before grilling. Cooking from frozen results in a charred exterior and a raw interior. Thaw them safely in the refrigerator for 24 hours before preparation.
How do I know when the chicken is done?
The most accurate method is using a digital meat thermometer to ensure the internal temperature reaches 165 degrees F. Alternatively, the juices should run clear when the thickest part of the breast is pierced.
Can I cook these without an oven?
Yes, you can cook them entirely on the stovetop by lowering the heat to medium and covering the pan with a lid. This traps heat to cook the center, but it may take longer and the sear may be less intense.
Why are there no grill marks on my chicken?
Lack of marks usually means the pan wasn’t hot enough or the chicken was moved too early. Let the chicken sear undisturbed for the full 4 minutes on the first side to allow the ridges to char the meat.
What is the best oil for this recipe?
Avocado oil is highly recommended because it has one of the highest smoke points of any cooking oil. This allows you to sear the chicken at high heat without the oil breaking down or smoking excessively.
Can I use chicken thighs instead?
Yes, boneless skinless chicken thighs work well with this method. However, thighs typically require a slightly longer cooking time in the oven due to their different fat content and structure.
Print
Stovetop Grilled Chicken Breasts Using a Grill Pan
- Total Time: 30 minutes
- Yield: 3 servings 1x
- Diet: General
Description
Today I am showing you how to make grilled chicken breasts on the stovetop with a grill pan. This has been one of the most popular recipes.
Ingredients
- 3 raw boneless skinless chicken breasts (around 7.5 ounces each)
- Salt, to taste
- Pepper, to taste
- 3/8 teaspoon dried oregano
- 3/8 teaspoon dried basil
- 3/4 teaspoon granulated garlic
- Cooking spray or oil (avocado, coconut, or canola)
Instructions
- Preheat: Preheat oven to 350 degrees F.
- Season: Add seasonings to both sides of the raw chicken breasts.
- Heat Pan: Spray indoor grill pan with cooking spray, and preheat on the stovetop over medium high heat for about one minute.
- Sear: Place the chicken breasts on the hot grill pan.
- Brown: Cook on the first side for about 4 minutes, and turn the chicken breasts over on the other side.
- Flip: Cook on the second side for about two minutes, and then place the grill pan into the preheated oven.
- Bake: Cook in the oven for about 20 minutes, until chicken is cooked all the way through.
- Rest: Let the chicken rest for 5 minutes before serving.
- Store: Store leftovers in the refrigerator.
Notes
Smaller chicken breasts may require less oven time.
- Prep Time: 3 minutes
- Cook Time: 26 minutes
- Category: Main Course
- Method: Grilling and Baking
- Cuisine: American
Nutrition
- Serving Size: 1 chicken breast
- Calories: 128 kcal
- Sugar: 1 g
- Sodium: 131 mg
- Fat: 2 g
- Saturated Fat: 0.6 g
- Unsaturated Fat: 1.4 g
- Trans Fat: 0 g
- Carbohydrates: 2 g
- Fiber: 0.5 g
- Protein: 23 g
- Cholesterol: 72 mg