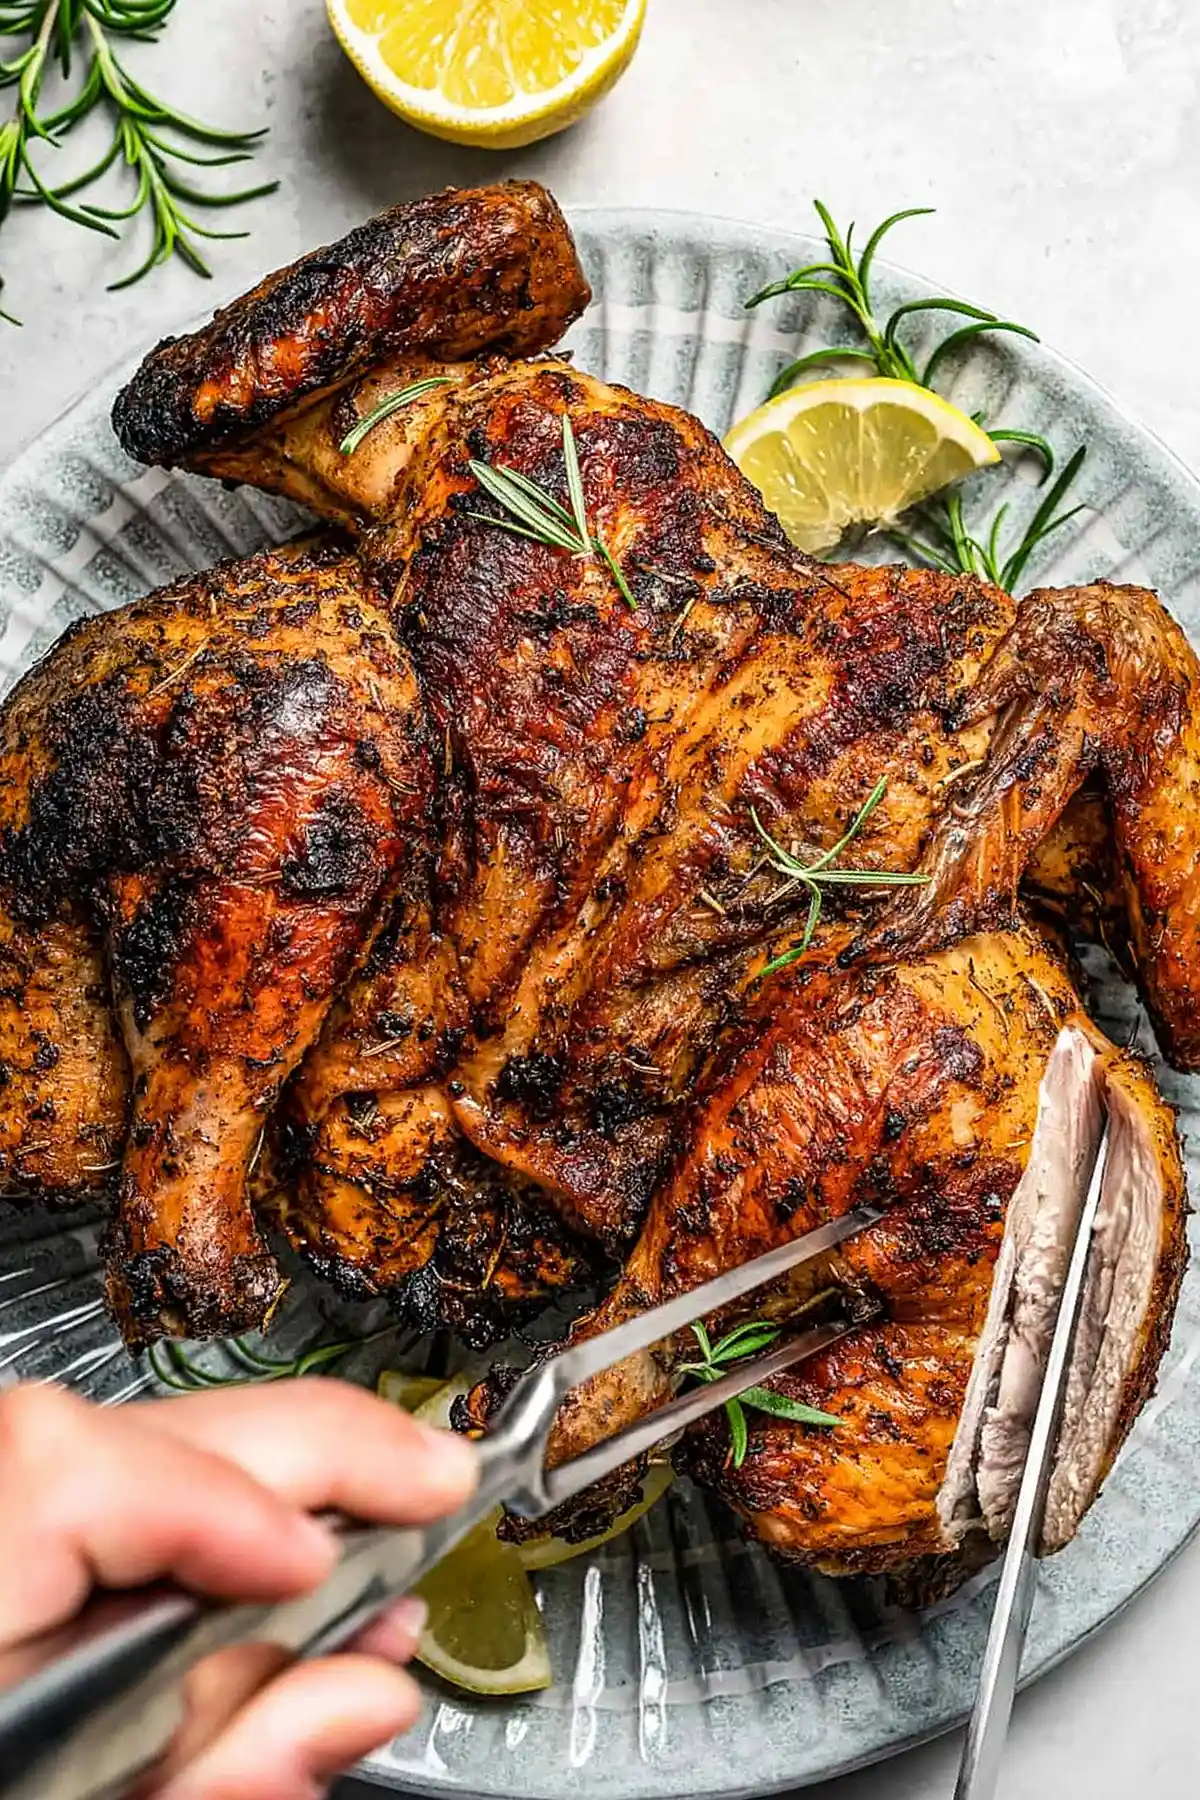
Spatchcocking is an efficient way to grill a whole chicken, ensuring the meat cooks evenly and quickly. This herb-seasoned recipe results in a juicy bird with crispy skin and a bold flavor profile.
List of ingredients
- 3 to 4 pounds broiler/fryer chicken, spatchcocked – ensure the bird is fresh for best results.
- 3 tablespoons olive oil – used for the marinade base and moisture.
- 3 tablespoons lemon juice – adds brightness and tenderizes the meat.
- 3 cloves garlic, minced – provides a savory, aromatic depth.
- 1 tablespoon white vinegar – helps break down fibers for a more tender result.
- ½ tablespoon paprika – gives the skin a rich, golden color.
- 2 teaspoons dried thyme – adds a classic earthy herb note.
- 2 teaspoons dried oregano – provides a Mediterranean flavor profile.
- 1 teaspoon dried rosemary – contributes a strong, piney aroma.
- 1 teaspoon salt – enhances all other flavors in the rub.
- ½ teaspoon fresh ground black pepper – adds a mild spicy kick.
step-by-step instructions
- Heat the Grill: Preheat your grill to medium-high heat to ensure a good sear.
- Position the Bird: Place the chicken on a sturdy cutting board with the breast-side facing down.
- Remove the Backbone: Use sharp kitchen shears to cut through the ribs along both sides of the backbone.
- Clear the Cavity: Continue cutting through the neck cavity to completely remove the backbone; save it for stock or discard.
- Flatten the Chicken: Flip the bird over and press firmly on the center of the breasts until the bone pops and the chicken lies flat.
- Prepare the Marinade: In a mixing bowl, combine the olive oil, lemon juice, minced garlic, vinegar, paprika, thyme, oregano, rosemary, salt, and pepper.
- Dry the Surface: Pat the chicken skin completely dry with paper towels to ensure the seasoning sticks.
- Apply Seasoning: Gently loosen the skin and rub the marinade both underneath and on top of the skin.
- Prep the Grates: Brush the grill grates with vegetable oil to prevent the skin from sticking.
- Sear the Skin: Place the chicken skin-side down over direct heat for 5 to 6 minutes until golden brown.
- Finish Cooking: Reduce the heat to low, flip the chicken skin-side up, and grill for 35 to 45 minutes. Use a meat thermometer to ensure the thickest part reaches 165°F.
- Rest the Meat: Remove the chicken from the grill, tent it loosely with foil, and let it stand for 10 minutes before carving.
Professional Grilling Techniques
Managing Gas Grill Temperatures
Start with medium-high heat to achieve a deep sear on the skin during the first few minutes. Once the skin is charred, immediately lower the heat to a low setting. This prevents the exterior from burning while the interior reaches the safe internal temperature.
Setting Up Two-Zone Charcoal Heat
Create a two-zone fire by piling hot coals on one side of the grill and leaving the other side empty. Sear the chicken directly over the coals for the initial browning phase. Move the bird to the indirect side and close the lid to finish cooking like an oven.
Preventing Flare-ups on the Grill
Trim any excessive hanging fat from the chicken before grilling to reduce drippings. Keep a spray bottle of water nearby to dampen small flames quickly. If large flare-ups occur, move the chicken to a cooler part of the grill temporarily.
Preparation and Tool Advice
Selecting Heavy-Duty Kitchen Shears
Use shears with a strong hinge and sharp blades capable of cutting through bone. Avoid using thin craft scissors or dull knives, as these can slip and cause injury. Heavy-duty poultry shears make the spatchcocking process much faster and safer.
Technique for Removing the Backbone
Start your cut at the tail end and move steadily toward the neck. Ensure you cut completely through the ribs on both sides of the spine. A clean cut prevents the bird from sitting unevenly on the grill grates.
Properly Flattening the Chicken
When pressing down on the breastbone, use the heel of your hand to apply firm, steady pressure. You should feel or hear a pop, which indicates the breastbone has flattened. This ensures the chicken makes full contact with the heat source.
Preparing the Skin for Adhesion
Moisture on the skin creates steam, which prevents the skin from becoming crispy. Use absorbent paper towels to pat every inch of the bird dry. This allows the oil-based marinade to adhere better and promotes a better sear.
Seasoning and Flavor Modifications
Distributing the Rub Under the Skin
Carefully slide your fingers between the breast meat and the skin to create a pocket. Rub a generous amount of the marinade directly onto the meat. This ensures the flavor penetrates the thickest parts of the bird rather than just sitting on the surface.
Swapping White Vinegar for Other Types
Apple cider vinegar can be used for a slightly fruitier, sweeter undertone. Rice vinegar offers a milder acidity that is less aggressive than white vinegar. Both alternatives work well and maintain the tenderizing properties needed for the meat.
Substituting Fresh Herbs for Dried
If using fresh thyme, oregano, or rosemary, triple the quantity listed in the recipe. Finely chop the fresh leaves to ensure they distribute evenly in the oil. Fresh herbs provide a more vibrant, grassy flavor compared to dried versions.
Using Garlic Powder as an Alternative
Substitute the fresh minced garlic with garlic powder if you prefer a more uniform flavor. Use about one-fourth teaspoon of powder for every clove of fresh garlic. This is a convenient option for those who want to avoid the risk of burnt garlic bits.
Adding Citrus Variations
Lime juice can replace lemon juice for a zestier, more tropical flavor profile. Orange juice can be mixed with the lemon juice to add a subtle sweetness. These changes pair exceptionally well with the paprika and oregano.
Increasing Heat with Spices
Add a pinch of cayenne pepper or red chili flakes to the marinade for a spicy kick. For a smokier profile, replace half of the paprika with smoked paprika. These additions enhance the charred flavor of the grill.
Serving and Pairing Suggestions
Pairing with Grilled Seasonal Vegetables
Place zucchini spears, bell pepper strips, or asparagus on the grill alongside the chicken. Brush them with the remaining marinade or a simple olive oil and salt mixture. These vegetables cook quickly and complement the herbed flavors of the bird.
Combining with Fresh Garden Salads
Serve the chicken with a crisp cucumber salad or a heirloom tomato salad. The acidity of a vinaigrette-based salad cuts through the richness of the grilled skin. Use fresh parsley or mint in the salad for added freshness.
Serving with Hearty Starches
Mashed potatoes provide a comforting contrast to the charred exterior of the chicken. Alternatively, serve the dish with roasted sweet corn or a wild rice pilaf. These options help soak up the juices from the rested meat.
Platter Presentation Tips
Carve the chicken into eight pieces: two breasts, two thighs, two drumsticks, and two wings. Arrange them on a large platter with lemon wedges for squeezing over the meat. Garnish with fresh sprigs of rosemary or thyme for a professional look.
Storage and Reheating Guide
Safe Refrigeration Practices
Allow the chicken to cool slightly before transferring it to an airtight container. Store the meat in the refrigerator for no more than three to four days. Ensure the container is sealed tightly to prevent the meat from absorbing other fridge odors.
Freezing for Long Term Storage
Remove the meat from the bones and place it in heavy-duty freezer bags. Squeeze out as much air as possible to prevent freezer burn. Store the chicken in the freezer for up to three months for optimal quality.
Thawing Procedures
Thaw frozen chicken slowly in the refrigerator overnight to maintain the texture of the meat. Avoid thawing on the counter, as this can lead to bacterial growth. If you are short on time, use the defrost setting on a microwave.
Reheating in a Covered Skillet
Place the chicken pieces in a skillet over low to medium heat. Cover the pan with a lid to trap the steam and keep the meat moist. This method is superior to microwaving, which often makes the chicken rubbery.
Preventing Meat from Drying Out
Add a splash of chicken broth or water to the skillet during the reheating process. This creates a small amount of steam that re-hydrates the meat. Heat only until the internal temperature reaches 165°F to avoid overcooking.
Common Troubleshooting and FAQs
Why is my chicken skin not crisping?
This usually happens if the skin was not dried properly before grilling or if the grill temperature was too low. Ensure you pat the bird dry and start with medium-high heat for the initial sear. Avoid overcrowding the grill, as this can lower the surface temperature.
How do I know when the chicken is fully cooked?
The only reliable method is using an instant-read meat thermometer. Insert the probe into the thickest part of the thigh, avoiding the bone. The chicken is safe to eat once it reaches an internal temperature of 165°F.
What should I do with the removed backbone?
Do not discard the backbone, as it is full of collagen and flavor. Place it in a pot with water, carrots, celery, and onion to simmer for a homemade chicken stock. Store the resulting broth in the freezer for future use.
Can I use a different size chicken?
Yes, you can use a larger or smaller bird, but you must adjust the cooking time. A larger chicken will require more time on the low-heat phase to cook through. Always rely on the internal temperature rather than a timer.
Why does the breastbone need to pop?
Popping the breastbone allows the chicken to lie completely flat against the grill grates. If the bird is curved, the breasts will cook slower than the legs and wings. Flattening ensures a uniform cook across the entire piece of meat.
Print
Herbed Spatchcock Grilled Chicken
- Total Time: 1 hour 15 minutes
- Yield: 4 servings 1x
- Diet: Low Carb
Description
Perfectly seasoned with herbs, garlic, and a bit of lemon juice for brightness, this spatchcock grilled chicken is a delicious, healthy, and low carb dinner!
Ingredients
- 3 to 4 pounds broiler/fryer chicken, spatchcocked
- 3 tablespoons olive oil
- 3 tablespoons lemon juice
- 3 cloves garlic, minced
- 1 tablespoon white vinegar
- ½ tablespoon paprika
- 2 teaspoons dried thyme
- 2 teaspoons dried oregano
- 1 teaspoon dried rosemary
- 1 teaspoon salt
- ½ teaspoon fresh ground black pepper
Instructions
- Step: Preheat grill to medium-high heat.
- Step: Place the chicken on a cutting board, breast-side-down.
- Step: Using sharp kitchen shears, cut out the backbone of the chicken, cutting right through the ribs along each side.
- Step: Cut out the backbone all the way up each side and through the neck cavity. Remove the bone and save it for making homemade chicken stock, or discard.
- Step: With the backbone removed, turn the chicken over and press down firmly in the center of the breasts to flatten it. Set aside.
- Step: In a bowl, mix together the olive oil, lemon juice, garlic, vinegar, paprika, thyme, oregano, rosemary, salt and pepper.
- Step: Pat dry the chicken with paper towels.
- Step: Carefully loosen skin from chicken; rub the seasoning mixture under and over the skin.
- Step: Brush the grill grates with vegetable oil.
- Step: Grill the chicken, skin-side down, over direct heat for about 5 to 6 minutes, or until golden brown and a bit charred.
- Step: Reduce heat to low; flip the chicken and continue to grill for about 35 to 45 minutes, or until an instant read meat thermometer inserted into the thickest part of the meat registers at 165˚F.
- Step: Remove chicken from grill and tent with foil; let stand for 10 minutes before carving and serving.
Notes
Do not rinse the whole chicken, but wash hands before and after handling raw poultry. Always use a meat thermometer to ensure an internal temperature of 165˚F. For charcoal grilling, move chicken to indirect heat after the initial sear to prevent drying out.
- Prep Time: 15 minutes
- Cook Time: 45 minutes
- Category: Dinner
- Method: Grilling
- Cuisine: American
Nutrition
- Serving Size: 1 serving
- Calories: 458 kcal
- Sugar: 0.4 g
- Sodium: 698 mg
- Fat: 35 g
- Saturated Fat: 9 g
- Unsaturated Fat: 24 g
- Trans Fat: 0.2 g
- Carbohydrates: 3 g
- Fiber: 1 g
- Protein: 31 g
- Cholesterol: 122 mg